PINEAPPLE PEACH BREAD PUDDING

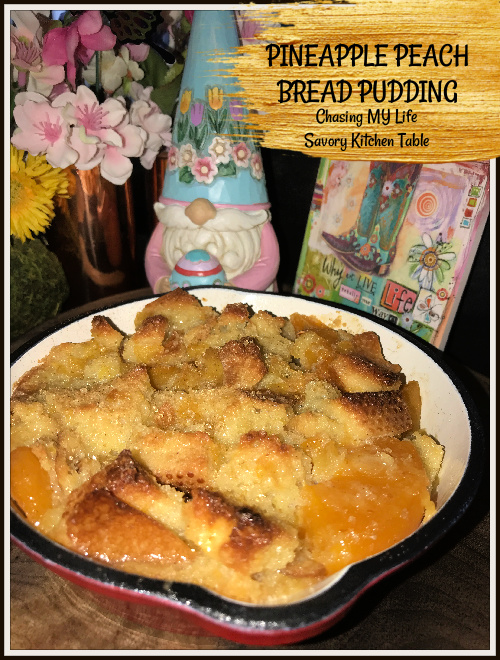
PINEAPPLE PEACH BREAD PUDDING is a summer dessert that’s bursting with pineapple and peach flavor, but can be easily converted to just about any flavor you want for any time of the year! Small wild blueberries are a winter favorite. 

😀 You can serve it with or without caramel sauce and ice cream 😀

8 cups bread, cubed
3 LARGE eggs
3 tablespoons melted butter
1 cup pineapple yogurt
1 cup WHOLE milk
2 cups Sugar
1 SMALL can pineapple, WELL drained

1 1/2 cups FRESH peaches, peeled, pitted and diced *(see note)
½ cups chopped pecans
1 teaspoon QUALITY cinnamon

  • Preheat oven to 350°.
  • Spray a 9×13 baking dish with cooking spray.
  • In a large bowl beat 3 eggs, add melted butter, yogurt and milk. Add 2 cups sugar slowly, stirring until it is dissolved. Add peaches and bread, mixing well.
  • Allow mixture to soak into bread 30 minutes.
  • In a small bowl, stir together 2 Tbsp sugar and 1 tsp cinnamon.
  • Pour the bread mixture into 9×13 baking dish, and sprinkle with cinnamon sugar mixture. Cover loosely with buttered foil and Bake for 20 minutes.
  • Remove the foil, sprinkle with the pecans and bake until the top is golden and the center is set, 20 to 25 minutes longer.

CARAMEL SAUCE
1 cup unsalted butter
1 cup heavy cream
1 cup brown sugar

  • In a heavy saucepan over medium-low heat, stir together the butter, heavy cream, and brown sugar, bring to a boil.
  • Reduce heat to low, simmer until the sauce thickens, for about 5 minutes.
  • Pour over individual bread pudding servings.
  • Top with vanilla ice cream.

NOTE: You can use canned peaches or even frozen peaches. If using canned peaches be sure to drain them EXTRA well. If I use these I start the draining the night before and just cover them in the fridge over night. If using frozen, thaw them overnight and the drain well.

ZESTY CREAMED CHICKEN

There is almost no prep time for this recipe, it is so so versatile and the slow cooker actually does all the work! The whole family will be licking their plates when this creamy angel chicken recipe is on the menu. Serve it over a bed of angel hair pasta, mashed potatoes, biscuits, or rice. It’s one of our favorite weeknight recipes.

ZESTY CREAMED CHICKEN

1.5 pounds chicken breast, boneless and skinless
2-3 cloves garlic, minced
1 can cream of chicken soup** (see notes)
¾ cup chicken stock
¼ cup Philadelphia cream cheese
¼ cup butter
1 packet Good Seasons Italian dressing mix
Prepared pasta, jasmine rice or mashed potatoes for serving
chopped herbs, for garnish

  • Spray the inside of the crockpot with non stick cooking spray.
  • Add the chicken breasts in a single layer if possible.
  • Soften the butter and cream cheese in the microwave for 30 seconds at a time until melted enough to stir together smoothly.
  • Whisk in the undiluted cream of chicken soup, Italian dressing mix, minced garlic and chicken stock until well mixed.
  • Pour over the chicken breasts.
  • Turn chicken breast to coat in sauce.
  • Cover and cook on low for 6 to 8 hours.
  • Shred chicken into sauce using 2 forks.
  • Serve the chicken over pasta, jasmine rice or mashed potatoes

NOTES**

  • Cream of just about any flavor (celery, nacho cheese, mushroom, etc…) works with this recipe.
  • You can substitute white wine for the chicken broth.
  • You can also substitute a flavored cream cheese.

CHOCOLATE CHOCOLATE CHIP CARAMEL PUDDING COOKIES

CHOCOLATE CARAMEL CHOCOLATE CHIP PUDDING COOKIES

Yields 2-3 dozen cookies – Do your own experimenting with pudding flavors and/or chip flavors!  Adapted from Life in the Loft House

1 cup salted butter softened
3/4 cup brown sugar
1/4 cup granulated white sugar
1 – 3.7 ounce box GODIVA instant caramel chocolate pudding mix
2 LARGE eggs
1 teaspoon PURE vanilla extract
2 ⅓ cups all purpose flour
1 teaspoon baking soda
1 – 11 ounce package QUALITY milk chocolate chips

  • Preheat oven to 375°.
  • Line baking sheets with parchment.
  • Sift together the flour and baking soda. Set aside.
  • In a large bowl, or stand-mixer, combine the butter, sugars, pudding mix, eggs and vanilla.
  • Beat on medium speed until creamy and combined.
  • Gradually add in the flour and baking soda to the mixture, beating on low speed until just combined.
  • Stir in the chocolate chips.
  • Drop batter by tablespoons on un-greased cookie sheets.
  • Bake for only 9 to 10 minutes. They may not seemed fully baked, BUT THEY ARE! DO NOT OVER BAKE!
  • Remove from oven and let cookies rest and cool on the cookie sheets. There is no need to transfer them to wire racks, but be sure to cool them completely before putting them in the cookie jar.
  • Enjoy these delicious devils by dunking them in milk! ♥

CHIPOTLE CHICKEN

CHIPOTLE CHICKEN

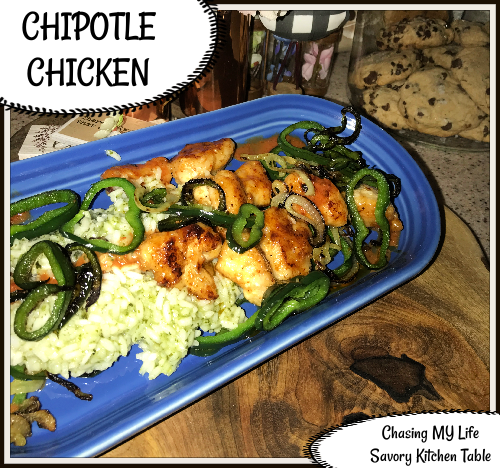
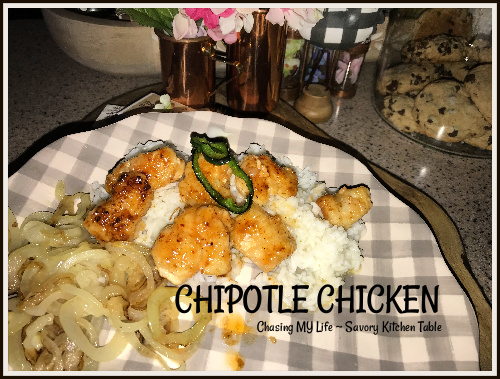
2 boneless chicken breasts, cut into bite sized pieces
1 + 1 tablespoons butter
1 Poblano pepper. stemmed, seeds removed and sliced
1 small yellow onion, sliced thin
FRESH ground sea salt and black pepper
¼ cup Cornstarch
2 tablespoons mayonnaise
2 +/- teaspoons Chipotle chile paste
¼ cup FRESH cilantro FINELY chopped
1 tablespoon QUALITY honey
Prepared white rice, mashed potatoes or pasta
2 tablespoons grated Cotija cheese

  • In a large bowl, whisk together the mayonnaise, honey, 1 teaspoon of warm water, and as much of the chile paste as you’d like, depending on how spicy you’d like the dish to be – set aside until needed.
  • Heat 1 tablespoon butter in non stick skillet.
  • Add onions and peppers, sautéing 3-5 minutes until soft and beginning to caramelize.
  • Season chicken pieces with FRESH ground sea salt and black pepper.
  • Coat chicken pieces with cornstarch, shaking off excess.
  • Add remaining 1 tablespoon butter to skillet.
  • When butter is melted add chicken pieces in a single layer cooking 3-4 minutes or until lightly browned on all sides.
  • Pour reserved sauce over chicken, stirring to coat well.
  • Garnish with Cotija cheese and cilantro. Cilantro is also good added to rice, pasta or potatoes.

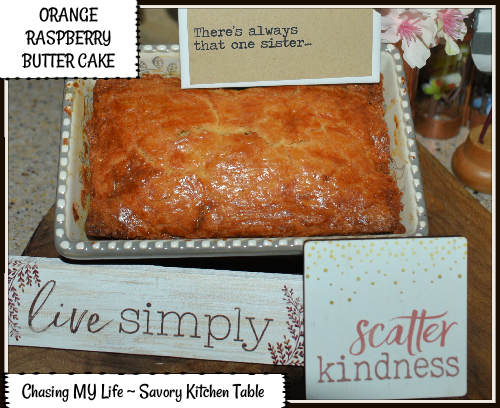
ORANGE RASPBERRY BUTTER CAKE

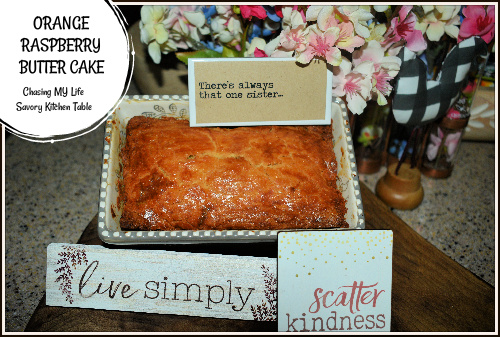
ORANGE RASPBERRY BUTTER CAKE Yield 2 9inch layers, 12-16 serving(s)
1 cup butter, softened
1 1/2 cups sugar
3 LARGE eggs
3 LARGE egg yolks
1 tablespoon PURE vanilla
3 1/4 cups cake flour
1 1/2 teaspoons baking powder
1/4 teaspoon salt
1 cup WHOLE milk
1/4 cup orange liqueur (raspberry liqueur or rum also work well)

  • Preheat oven to 350°.
  • Butter and flour two 9-inch round cake pans.
  • In mixer bowl, on medium-high speed, beat butter and sugar 4-5 minutes until fluffy.
  • Add eggs, then yolks, one a time, beating well after each, scraping sides of bowl occasionally.
  • Beat in vanilla.
  • In another bowl, sift together flour, baking powder and salt.
  • Mix in about a third of flour mixture into butter mixture.
  • Stir in half the milk and liqueur, just until blended.
  • Stir in another third of flour mixture,.
  • Add the remaining milk and liqueur and then the rest of the flour mixture.
  • Spread batter equally into the cake pans.
  • Bake 25-30 minutes until toothpick inserted in the center comes out clean.
  • Cool on racks in pans for 10 minutes, then invert cakes onto racks and remove pans.
  • Cool completely before frosting.

NOTE: This cake is good with or without frosting or glaze.

ORANGE LEMON ORANGE ROUGHY

ORANGE LEMON ORANGE ROUGHY

1 tablespoon avocado oil
4 – 6 ounce orange roughy fillets
1 LARGE orange, juiced
1 LARGE lemon, juiced
1 lemon, quartered for serving
FRESH ground sea salt and black pepper
1 tablespoon butter
chopped green onion tops

  • Heat oil in a large skillet over medium-high heat.
  • Arrange fillets in the skillet, and drizzle with orange juice and lemon juice.
  • Season to taste with FRESH ground sea salt and black pepper.
  • Cook for 5 minutes, or until fish is easily flaked with a fork.
  • Plate fillets.
  • Whisk butter into pan drippings quickly. Pour over fillets.
  • Top with green onion tops.
  • Serve immediately.

ZEBRA CAKE

While this recipe didn’t turn out exactly as planned, the flavor was amazing so we will be trying again for a better stripe and a better picture. 😀

ZEBRA CAKE

VANILLA LAYER
2 ¾ cups cake flour
2 cups granulated sugar
1 tablespoon baking powder
1 teaspoon salt
6 tablespoons unsalted butter softened to room temperature
⅔ cup avocado oil
¾ cup whole milk, room temperature
½ cup sour cream
1 tablespoon clear vanilla extract
6 LARGE or EXTRA LARGE egg whites, room temperature

  • In a stand mixer sift together flour, sugar, baking powder, and salt until thoroughly combined.
  • Turn your mixer to low speed and add butter, one tablespoon at a time, not adding the next tablespoon until the first is completely incorporated. When you’re finished, the mixture should resemble coarse sandy crumbs.
  • Add oil and stir until combined.
  • In a measuring cup, whisk together milk, sour cream, and vanilla extract and stir into batter until thoroughly incorporated.
  • In a separate clean, dry, chilled and grease-free bowl use clean beaters to beat egg whites to stiff peaks.
  • Use a spatula to gently fold egg whites into batter – DO NOT OVER MIX, but make sure there are no lumps of egg white remaining either.
  • Portion 3 cups of batter into a separate bowl. You’ll be left with 5 cups in the first bowl that will be used to make into the chocolate batter.

CHOCOLATE LAYER
scant ¼ cup dark cocoa powder
2 tablespoons boiling water
2 tablespoons sour cream
2 tablespoons granulated sugar

  • In a large measuring cup, stir together hot water and cocoa powder – it will be thick!
  • Add sour cream and sugar, whisking until well combined.
  • Stir into the smaller bowl of batter and use a spatula to carefully stir together until completely combined

BAKING ASSEMBLY

  • Preheat your oven to 350°.
  • Prepare two 8 inch round cake pans AT LEAST 2” deep by lining each of the bottoms with a round of parchment paper and generously spraying the sides with baking spray.
  • Dollop approximately ⅓ cup of white batter into the center of each of your prepared cake pans.
  • Using a clean scoop, scoop just shy of ⅓ cup of chocolate batter and drop that directly onto the center of the white batter.
  • Repeat, alternating batter flavors, until you have used all of the batter.
  • Take a reasonable amount of care so that your white batter doesn’t touch another ring of white batter nor does a ring of chocolate overlap with any of the other chocolate batter, this will keep your stripes looking like stripes and not like marbled swirls.
  • Carefully transfer pans to oven and bake for 35-40 minutes or until a toothpick inserted in the center comes out clean or with moist crumbs.
  • Allow to cool in pans for 15 minutes then run a knife around the edges of the cake to loosen from the sides (if needed) and carefully invert onto a cooling rack to cool completely.
  • If needed, carefully level the cakes with a sharp serrated knife once completely cooled.
  • Decorate.

NOTES:

  • THIRD STRIPE If you would like a 3rd color stripe make a half batch of the vanilla cake and add food coloring accordingly. You’ll also need to use 9 inch pans. If making it a red strip I use a half portion of my red velvet cake recipe.
  • CAKE FLOUR I recommend cake flour for two reasons with this cake: 1) it has a lighter texture and when you use all-purpose flour the cake ends up a bit heavier and tends to sink in on itself a little bit. 2) it produces a finer crumb, which makes the stripes even bolder and more defined.
  • VANILLA EXTRACT you may substitute regular vanilla extract, but clear extract helps to keep the cake batter pure white.
  • COCOA POWDER I use “special dark” cocoa powder because it makes the zebra stripes darker and closer to black, but you may substitute natural cocoa powder.

RED VELVET CAKE
2 1/2 cups all purpose flour
1 1/2 cups sugar
1 teaspoon baking soda
1 teaspoon fine sea salt
1 teaspoon QUALITY cocoa powder
1 1/2 cups avocado oil
1 cup buttermilk, room temperature
2 LARGE eggs, at room temperature
2 tablespoons QUALITY red food coloring
1 teaspoon white distilled vinegar
1 teaspoon PURE vanilla extract

  • Preheat the oven to 350°.
  • Lightly oil and flour three 9 by 1 1/2-inch round cake pans.
  • In a large bowl, sift together the flour, sugar, baking soda, salt, and cocoa powder.
  • In another large bowl, whisk together the oil, buttermilk, eggs, food coloring, vinegar, and vanilla.
  • Using a standing mixer, mix the dry ingredients into the wet ingredients until just combined and a smooth batter is formed.
  • Divide the cake batter evenly among the prepared cake pans.
  • Place the pans in the oven evenly spaced apart.
  • Bake, rotating the pans halfway through the cooking, until the cake pulls away from the side of the pans, and a toothpick inserted in the center of the cakes comes out clean, about 30 minutes.
  • Remove the cakes from the oven and run a knife around the edges to loosen them from the sides of the pans.
  • Invert the cakes onto a plate and then re-invert them onto a cooling rack, rounded-sides up. Let cool completely.

FINAL ASSEMBLY

  • Place 1st layer, rounded-side down, in the middle of a rotating cake stand.
  • Using a palette knife or offset spatula spread 1/4 to 1/2 inch layer of the frosting over the top of the cake.
  • Carefully set second layer on top, rounded-side down, and repeat.

SWISS MERINGUE BUTTERCREAM (not as sweet as an American buttercream)
Yield: 5 cups

Swiss Meringue Buttercream is not as sweet as American buttercream which makes it PURE perfection in my book because it’s the ideal balance of sweet AND creamy, without being as sugary as American buttercream, but still as thick and pipe-able.

6 LARGE FRESH egg whites (approximately 230g)
2 cups (400g) granulated sugar
1 and 1/2 cups (3 sticks; 350g) unsalted butter, cut into tablespoon sized pieces and softened but still cool *see note*
2 teaspoons PURE vanilla extract
1/8 teaspoon salt

  • Separate the eggs one at a time into a small bowl before placing them in a heat proof bowl.
  • Whisk sugar into the egg whites, then set the bowl over a saucepan filled with just two inches of simmering water over medium heat. Do not let the bottom of the egg whites bowl touch the water.
  • Whisk the egg whites and sugar together 4-5 minutes until sugar is COMPLETELY dissolved and the mixture has thinned out. (The mixture will be thick and tacky at first and then thin out and be frothy white on top.) To test that it’s ready, use your finger. Lightly and quickly dip your finger into the mixture (BE CAREFUL it will be very hot) and rub the mixture between your thumb and finger. You shouldn’t feel any sugar granules. OR use an instant read thermometer – the temperature should read 160°F (71°C).
  • Transfer mixture to the bowl of a stand mixer fitted with a whisk attachment while it’s still warm.
  • Beat on medium high speed 10-15 minutes until stiff glossy peaks form and the meringue is no longer warm to the touch. This will take a few minutes more on particularly humid days. MOISTURE IN THE MAKES A DIFFERENCE. If it’s still not reaching stiff peaks, stop the mixer, place the uncovered bowl in the refrigerator for 10 minutes, then return to the mixer and continue beating until stiff peaks form and the mixture has cooled to room temperature. You can put it in the refrigerator for a couple minutes if needed. If it’s too warm, the butter will melt instead of blend.
  • Switch to the paddle attachment.
  • On medium-high speed, add the butter 1 tablespoon at a time. Wait for the butter to fully mix in before adding the next tablespoon.
  • Add the vanilla, salt and flavor if using beating 30 seconds until completely incorporated. It should be thick, creamy and silky smooth.

NOTES

TROUBLESHOOTING TOO THICK  If the meringue has separated, curdled, or is too thick at any point after you mix in all of the butter, place the mixture in your heat-proof bowl back over a pot of 2 inches of simmering water – DO NOT STIR. Let the edges of the meringue warm up 1-2 minutes and become liquid while the center of the meringue is still be solid. Remove from heat and return to the mixer. Beat meringue on low speed for 30 seconds, then switch to medium-high speed and beat until smooth, about 2 minutes.

TROUBLESHOOTING TOO THIN If the meringue becomes too thin after you add the butter, place the entire bowl in the refrigerator for no more than 20 minutes at a time (any longer will make the butter solid) to cool down. Return it to the mixer and beat on medium-high speed until thickened.  If it’s still soupy, place back in the refrigerator again before re-whipping again.

EGG WHITES For best success use FRESH eggs. FUN FACT – eggs separate much easier when they’re cold. Be sure and separate the egg whites one at a time into a small bowl and then place the egg white into a large heat-proof mixing bowl, double boiler or the metal mixing bowl from your stand mixer before separating the next. This way, if a yolk breaks in one of them, you don’t waste the whole batch.

BUTTER This buttercream will become liquid-y (too thin) if the butter is too warm. Make sure you’re using butter that is slightly cooler than proper room temperature butter. Remove butter from the refrigerator and set it out for just 30-40 minutes before you need to add it to the meringue.

FLAVORS adding flavors can be tricky. Substituting extracts for the vanilla is one of the most fool proof ways.  Or even a teaspoon of espresso powder or frozen fruit powder. Taste, then add a touch more if desired. For potent extracts, like peppermint or almond use just 1/2 teaspoon. For chocolate, beat 8 ounces of PURE (like Baker’s OR Ghiradelli) melted and slightly cooled chocolate of choice into the buttercream at the same time you add the vanilla and salt.

COLORS If you are coloring use gel food coloring so it does not add any liquid.

HALVING OR DOUBLING If you halve the recipe the time to reach stiff peaks and cook time will be less. I DO NOT recommend doubling this recipe. If you need a double recipe make it in separate batches so you don’t overcrowd the bowls.

OR

CREAM CHEESE FROSTING
16 ounces cream cheese, softened
1/2 cup butter, softened
juice of 1 LARGE lemon
2 teaspoons PURE vanilla extract
3-4 cups powdered sugar

  • In a medium bowl beat cream cheese and butter until smooth.
  • Add lemon juice and vanilla. Beat until blended.
  • Add powdered sugar gradually until well blended and smooth and you reach desired consistency.
  • Ice first layer and then add 2nd cake top and ice again including sides of cake.
  • Refrigerate 1 hour to set icing before serving.

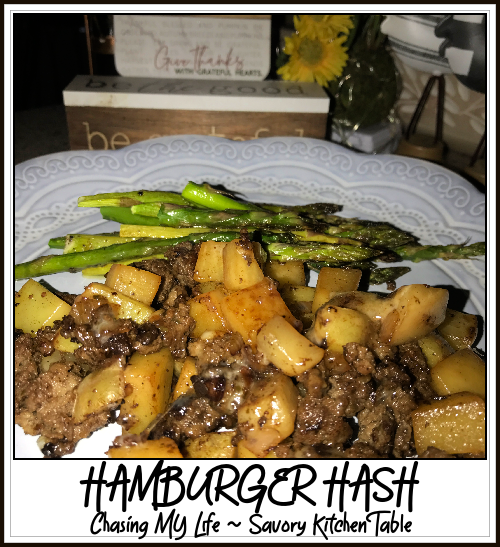
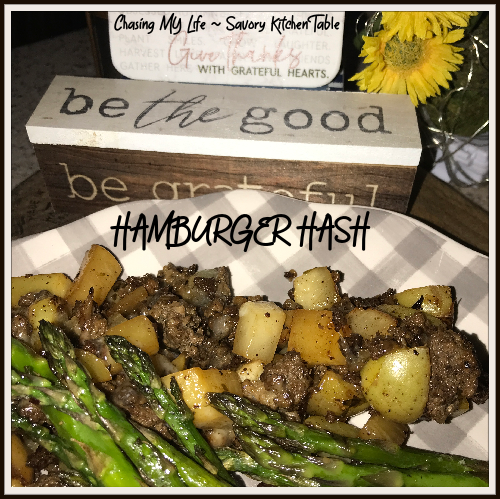
HAMBURGER HASH

Toss out the hamburger helper and make this instead. Another tasty one pot meal full of flavor and texture that’s quick and easy for classic comfort food weeknight family meal. The beauty of this recipe is that it is super easy to adjust the servings. I’m making most recipes for 2 these days, but just double or triple up and feed 4-6 in a jif.

HAMBURGER HASH – serves 2 adapted from SpaceShips and Laser Beams
Prep Time 15 mins Cook Time 20 mins Total Time 35 mins

1 SMALL russet potatoes, peeled and chopped into bite size pieces
1 small turnip or rutabaga, peeled and chopped into bite size pieces

3/4 pound lean ground beef
1/2 Vidalia onion, diced
2 teaspoons avocado oil
1-2 cloves garlic, minced
1 tablespoon Garden Gourmet Italian seasoning (or 2 teaspoons dried)
FRESH ground sea salt and black pepper
1/4 cup beef broth

1 1/4 cup shredded sharp cheddar cheese

  • Boil potatoes 3-5 minutes until tender, BUT NOT too soft.
  • Drain and set potatoes aside.
  • In a large nonstick or greased skillet, over high heat, cook ground beef until browned. Drain off fat. Set cooked beef aside.
  • 
Using the same skillet over medium heat avocado oil.
  • Add onion, potatoes, Italian seasoning, minced garlic, salt, and pepper. Toss well to evenly coat potatoes and onions in seasoning, cooking 10-15 minutes and stirring often until potatoes and onions have started to brown and crisp.
  • Fold ground beef back to the skillet, stirring well to mix.
  • Add broth and simmer until broth is mostly absorbed.
  • Add cheese, stirring until well mixed and melted.
  • Remove from heat.
  • Serve hot. 


NOTES

  • ALWAYS start your potatoes in cold water. Adding them directly to boiling water will immediately cook the outsides while the insides will take longer. Use a fork to gently pierce the potatoes while they are boiling. When the fork will pierce the potato easily but not break it apart, your potatoes are ready.
  • If using dried herbs, use a mortar and pestle or rub them between your clean dry palms to break them up and revive their flavor essence before adding them to your recipe.

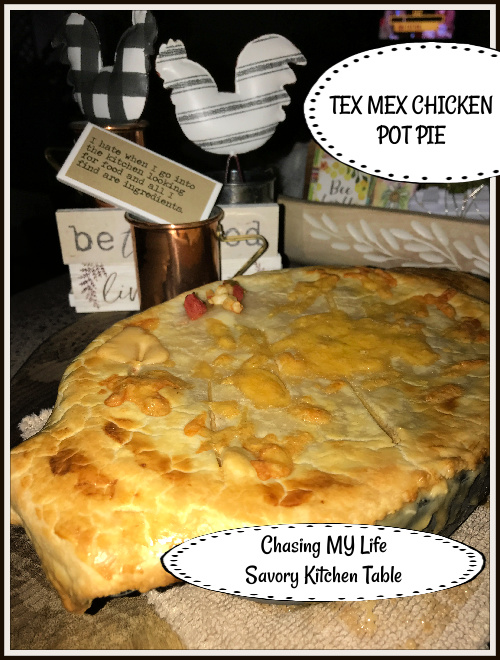
TEX MEX CHICKEN POT PIES for 2

TEX MEX CHICKEN POT PIES yields 2-3 individual pot pies

ACTIVE PREP TIME 1 hourish
CHILL TIME 20-30 minutes
TOTAL TIME
2 hourish

2 tablespoons salted butter
1 tablespoon Frank’s original Red Hot Sauce
1 can ROTEL original tomatoes, drained WELL
1 can white shoe peg corn, drained WELL
3 large green onions, diced 
FRESH ground sea salt and black pepper
3 tablespoons WONDRA flour, plus more for dusting 
1 cup homemade chicken broth 
1/2 cup heavy cream 
1/8 cup chopped fresh cilantro 
1 1/2 cups shredded rotisserie chicken
1/2 batch of your favorite pie crust – one recipe follows
All purpose flour, for dusting
1 LARGE egg, beaten 
1/4 cup grated cheese, Mexican blend or pepper jack cheese 

  • Preheat the oven to 400°.
  • Lightly spray 2-3 individual cast iron or heavy ceramic baking dishes. I also often use my pampered chef 1 1/2 quart cast iron baker to make a single pot pie for 2.
  • Melt the butter in a large skillet over medium heat.
  • Add onions, corn and tomatoes.
  • Season with a pinch of FRESH ground sea salt and black pepper, cooking 2-3 minutes to soften the vegetables.
  • Sprinkle the flour over the vegetables and stir 1-2 minutes until the flour has coated the vegetables.
  • Add chicken broth, stirring constantly.
  • Stir in the cream, cilantro and hot sauce.
  • Allow sauce to come to the boil and thicken 2 to 3 minutes.
  • Remove from heat and adjust seasoning to taste.
  • Add the chicken and stir to combine.
  • Add half the cheese stirring to combine.
  • Portion into baking dishes.
  • Roll out the Pie Crust on a lightly-floured surface.
  • Carefully lay the crusts over each baking dish, pressing gently into the sides to seal.
  • Brush the top with the beaten egg and sprinkle with remaining cheese.
  • Cut 2 to 3 small slits in the top and bake until the crust is golden, about 30 minutes.
  • Cool slightly 10 minutes before serving.

PERFECT PIE CRUST – makes one full batch of dough, but you’ll only need a third to one half of it for this recipe.
3 cups all-purpose flour
1 teaspoon kosher salt 
3/4 cup (1 1/2 sticks) salted butter, cut into small pieces 
3/4 cup vegetable shortening, cut into small pieces 
1 LARGE egg 
1 tablespoon distilled white vinegar 
5 tablespoons COLD Vodka or cold water, or more as needed 

  • Combine the flour, salt, butter and shortening in a large bowl.
  • Using a pastry cutter, gradually work it all together until the mixture resembles coarse crumbs.
  • Beat the egg with a fork and add it to the mixture along with the vinegar.
  • Add the cold water.
  • Stir it all together until it comes together, adding another tablespoon or two of water if it needs the moisture.
  • Form the mixture into 2 balls and wrap them in individual plastic bags.

NOTE:

  • I use vodka because it tends to make a flakier crust as it evaporates during the baking process.
  • If using immediately, chill for 20 minutes in the refrigerator before rolling out. If freezing, remove them from the freezer 30 minutes before you are ready to use them.

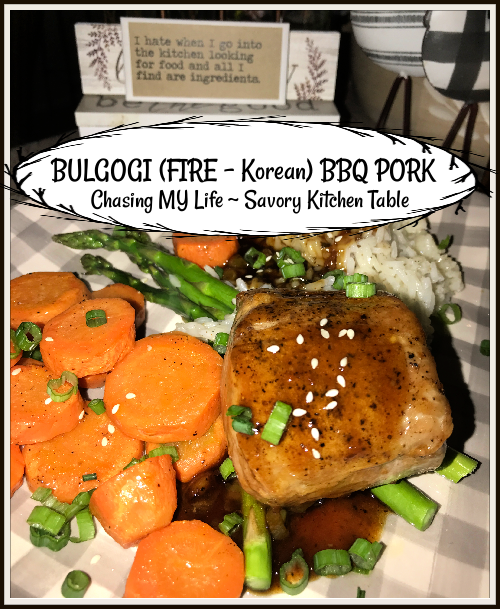
BULGOGI (FIRE – Korean) BBQ PORK

This is traditionally made with thin slices of beef, but we had it in a Hello Fresh meal with pork tenderloin and enjoyed the flavor so much that I decided to recreate it. Traditionally it is served in thin slices, but works well on steaks and cutlets too.

BULGOGI (FIRE – Korean) BBQ PORK

1 pork tenderloin cut into 1 inch steaks
1/2 small pear or Japanese apple, peeled and coarsely grated
1/4 cup Bragg’s liquid aminos
2 tablespoons brown sugar
2 tablespoons toasted sesame oil
3 cloves garlic, FINELY minced
2 teaspoons freshly grated ginger
1 tablespoon Gochujang
1 tablespoons avocado oil
1 tablespoon butter
2-3 green onions, thinly sliced, whites and greens separated
1 teaspoon toasted sesame seeds
Prepared rice


  • In a medium bowl, stir together the grated pear, soy sauce, brown sugar, sesame oil, garlic, ginger and gochujang. Set aside for the moment.
  • Preheat oven to 425°.
  • Lightly spray a small sheet pan with non stick spray. Set aside.
  • Pat pork steaks dry with paper towels.
  • Generously season pork all over with salt and pepper.
  • Heat 1 tablespoon of avocado oil in a large skillet over medium heat.
  • Add pork; sear, turning occasionally, until browned all over, 4-8 minutes.
  • Add to sheet pan in a single layer.
  • Roast on top rack for 10-12 minutes until steaks are cooked through. Turn them over half way through.
  • Using the skillet the pork steaks were seared in heat butter over medium heat.
  • Add green onion whites and sear 1-2 minutes.
  • Pour in sauce ingredients from the bowl and bring to a SLOW boil.
  • Reduce heat and simmer until thick. Add 1 tablespoon of water at a time to thin out the sauce if necessary.
  • Thinly slice pork crosswise, if desired.
  • Drizzle pork  and rice with sauce.
  • Sprinkle with scallion greens and toasted sesame seeds.

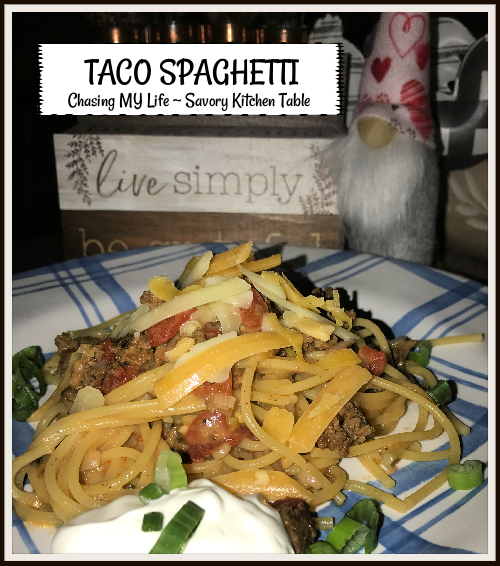
TACO SPAGHETTI

I loved this recipe because it was ALL made in the same pan so it’s quick and easy clean up, but also because I can no longer eat a lot of grain products so I still feel like I’m getting my tacos without have to deconstruct them! After making it exactly as written the first time, I adapted it the next time and found it was just easier and tastier to prepare the noodles separately.

You can always add your favorite taco toppings such as extra cheese, green onions or a dollop of sour cream to make it your own.

TACO SPAGHETTI servings 2 – adapted from Space Ships & Laser Beams

2 teaspoons avocado oil
1/3 pound QUALITY ground beef
1/4 cup chopped yellow onions
2 teaspoons taco seasoning
1/3 cup original Rotel tomatoes with juice
spaghetti noodles for 2, prepared al dente
1/3 cup homemade bone broth (chicken or beef – your choice)
1/2 cup Mexican style shredded cheddar/Jack cheese
scant 1/4 cup cilantro, chopped
minced green onions, for garnish
chopped olives, for garnish
chopped jalapeños, for garnish

  • Heat oil in a LARGE skillet over medium heat. 

  • Brown ground beef and onion in skillet until meat is no longer pink and onions are soft and translucent.

  • Add taco seasoning, tomatoes (including juice) and broth.

  • Cover and simmer for 10 minutes until most of the liquid is absorbed.

  • Stir in noodles, stirring to coat well and simmer 5 minutes more.
  • Remove from heat.
  • Sprinkle half of the cheese and half the cilantro into the pan and stir to coat the spaghetti with the cheese and sauce.

  • Top with remaining cheese and cilantro.
  • Serve with a dollop of sour cream and your favorite taco toppings.


NOTES

  • For the best flavor, grate your own cheese rather than using a store bought bag of grated cheese. The store bought grated version usually has an anti-caking agent on it so it doesn’t melt as well.
  • For a quicker weeknight cooking time, ground beef can be cooked ahead of time. Store in the refrigerator for up to 3 days or in the freezer for up to a month.

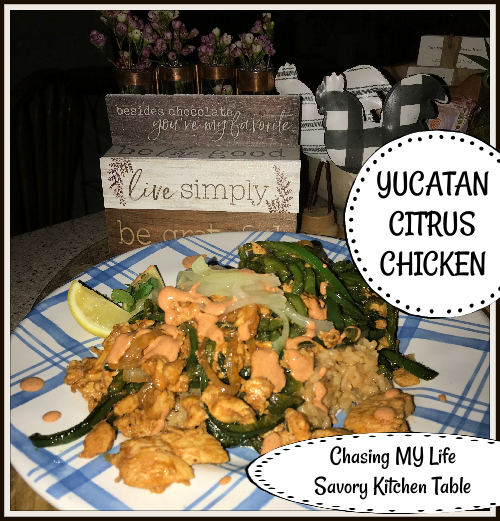
YUCATAN CITRUS CHICKEN

This was originally a recipe from Hello Fresh that I have adjusted and adapted to our liking.

In my opinion tangy citrus is probably the most key ingredient in the Yucatan’s vibrant cuisine. Lemon and orange juices are often used to marinate pork, chicken and even beef as well as also used as pickling liquid for a tangy onion garnishes. When paired with zesty spices it adds a savory note to the tang as it tenderizes the meat and creates mouth watering results.

SAUCE
2 tablespoons sour cream
1 teaspoon Ancho Chili Powder
1 teaspoon Smoked Paprika

  • In a small bowl whisk together the sour cream, paprika, chili powder and a pinch of salt.
  • Add water 1 teaspoon at a time until mixture reaches a drizzling consistency.
  • Set aside until needed.

QUICKLED ONIONS
FRESH ground sea salt and black pepper
2 tablespoons lemon juice
¼ teaspoon sugar

  • In a small microwave safe bowl toss the onion slices, lemon juice, sugar and pinch of salt together.
  • Microwave 30 seconds to 1 minute until onions are softened.
  • Set aside until needed.
  • Drain before serving.

TEX MEX RICE
1/2 teaspoon cumin
1/2 teaspoon chili powder
1/2 teaspoon garlic powder
½ cup Jasmine Rice
1 cup water
LARGE pinch sea salt
1 tablespoon butter

  • In a small pan combine rice, water, spices, and a large pinch of salt.
  • Bring to a boil, reduce heat to low, cover and simmer 15-18 minutes until rice is tender.
  • Keep covered off heat until ready to serve.

YUCATAN CITRUS CHICKEN
1 LARGE lemon, zested and juiced
1 yellow onion, halved and sliced thin
1 Poblano pepper, halved, cored and thinly sliced into strips
¼ cup ROUGHLY chopped cilantro
3/4 pound chicken strips, cut into small pieces
1/2 teaspoon cumin
1/2 teaspoon chili powder
1/2 teaspoon garlic powder
3-4 tablespoons Tex-Mex Paste (2 “cubes” from recipe below)
1 tablespoon avocado oil

  • Pat chicken dry with paper towels.
  • In a small bowl whisk together Tex-Mex paste, mandarin juice, lemon juice, lemon zest, cumin, chili powder and garlic powder.
  • Toss chicken in bowl with mixture.
  • Chill for at least an hour, preferably overnight.
  • Heat a drizzle of avocado oil in a large pan over medium-high heat.
  • Add poblano and season with FRESH ground salt and pepper.
  • Cook, stirring, until slightly softened, 3-4 minutes.
  • Add another drizzle of oil and remaining onion; season with salt and pepper.
  • Cook, stirring, until veggies are tender, 4-6 minutes.
  • Transfer to a plate.
  • Heat a drizzle of oil in the same pan over medium-high heat.
  • Add chicken in a single layer and cook, stirring occasionally, until lightly charred and cooked through, 4-6 minutes.
  • Taste and adjust seasoning with FRESH ground sea salt and pepper.
  • Stir in cooked veggies, then remove pan from heat.

ASSEMBLY

  • Fluff rice with a fork.
  • Stir in butter and season to taste with salt.
  • Divide rice between bowls and top with chicken and veggies, crema, and as much pickled onion as you like.
  • Sprinkle with cilantro.
  • Serve with lemon or lime slices.

TEX MEX PASTE
1 teaspoon garlic powder
2 teaspoons chili powder
1 teaspoon cumin
1 teaspoon coriander
1 teaspoon smoky paprika
4-5 teaspoons QUALITY cocoa
3 teaspoons sugar
3 teaspoons sea salt
3 teaspoons unseasoned rice wine vinegar
3 cloves garlic, mashed
2-3 ounces pureed Chipotle chilis
1 FULL bulb roasted garlic
3-4 teaspoons tomato paste
14 ounce can fire roasted tomatoes
1 white onion, FINELY diced

  • Puree diced onion and minced garlic in food processor.
  • Add chipotle chilis, roasted garlic and fire roasted tomatoes blending until smooth.
  • Add  vinegar and remaining ingredients blending until well mixed.
  • Portion into an ice cube tray or herb keeper for freezing to use at a later date.