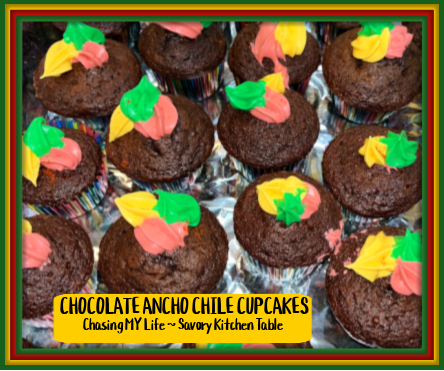
A friend and I are making the Cinco de Mayo dinner for the Eagles auxiliary on May 3rd and I have been experimenting with recipes for the dessert. These are dark chocolate cupcakes with a serious bite and are topped with a chili cream cheese frosting that has another back up bite.
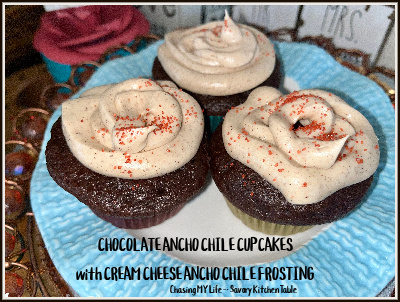
CHOCOLATE ANCHO CHILE CUPCAKES with ANCHO CHILE CREAM CHEESE FROSTING yield 18-24 cupcakes
CUPCAKES
1 box devil’s food chocolate cake mix
1 ½ – 2 teaspoons ground ancho chile pepper
¼ teaspoon cayenne pepper
½ teaspoon QUALITY cinnamon
1 ¼ cups water
⅓ cup vegetable oil
3 LARGE eggs
- Preheat oven to 350°.
- Line 24 muffin cups with paper liners.
- Whisk together the cake mix, ground ancho chile, cayenne pepper and cinnamon.
- Beat in water, oil and eggs with an electric mixer on medium speed for 2 minutes.
- Spoon batter into the prepared muffin cups, filling them 2/3 full.
- Bake 18-22 minutes until a toothpick inserted into the center of a cupcake comes out clean.
- Cool completely before frosting.
FROSTING
1 teaspoon ground ancho chile pepper
⅛ – ¼ teaspoon cayenne pepper
½ teaspoon QUALITY ground cinnamon
1 small, dried red chili, chopped after seeds removed (optional – if you dare)
4 cups powdered sugar
8 ounces cream cheese, softened
½ cup butter, softened
½ teaspoon clear PURE vanilla extract, or to taste
24 small dried red chiles (optional)
- Sift together the ground ancho chile, cayenne pepper and cinnamon with the powdered sugar in a large bowl.
- Beat in softened cream cheese and butter with an electric mixer on medium speed until smooth.
- Add vanilla extract.
- Spread frosting onto cooled cupcakes in attractive swirls.
- Poke a small dried chile, stem-side up, into frosting as a garnish if desired.