Category: CHRONICLES OF A BUNGLED REAL ESTATE DEAL
Spare Bedroom – Guest Ready – Finally!

Tunnel Light has been turned ON!!

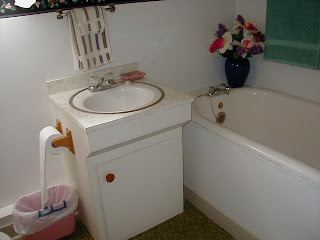
The previously OH NO… More Mold upstairs bathroom update! AKA The Light Will soon be turned on in the Tunnel!
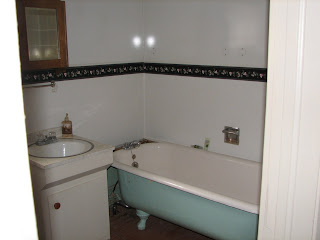
They also painted the wood floor a funky rust color and then had a cheap carpet remnant on top of that. We weren’t going to do anything but paint the floor for now, but found some serious molded rotted wood as we began the plumbing. We looked at doing ceramic tile and then actually settled on a Laura Ashley ‘exotic’ (their word for the thicker solid pieces) floating plank floor for 2 reasons. 1) The Laura Ashley floor is self contained, and 2) the backing foam is already mounted to the back of each board, it was on sale, it was about $1.25 less a square foot than doing the tile.
Productive in that we got to this point, disappointing that we found more mold all along the way so there was more old lathe and plaster to be torn down, and exciting that we can begin to visualize this room done. I tried to bleach it and use KILZ first on the mold, but it always seems to work the hard way and we had to tear out most of the back and one side wall. So after getting to the tear down point that we were comfortable with no more mold, we added 3/4 inch foam insulation board and then white washed bead board on top of that to create the turn of the century feel we were looking for to go with the claw foot tub. We’re building a new and better enclosure around the vent pipe.
tunnel.
History of a barn and the hope of a greenhouse
History of a barn and the hope of a greenhouse
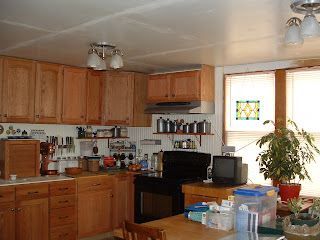
Tin Ceiling
Won’t it look great in my kitchen?
It will so fit with the character of this house.
Doesn’t it look like tin?
It’s really fiberboard.
Yep, really, it’s fiberboard, tongue and groove, lightweight and easy to install.
I tried an experiment and I think it’s going to work.
I’m using Rustoleum Silver Hammer Spray Paint
and 8 feet off the ground, they look just like tin
instead of this chalk white fiberboard.
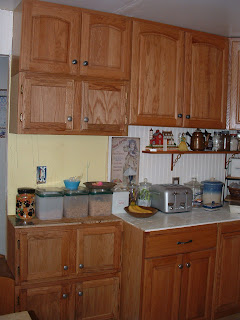
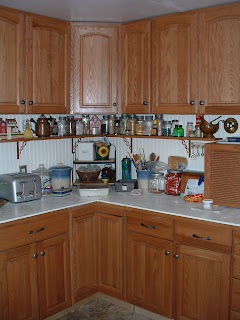
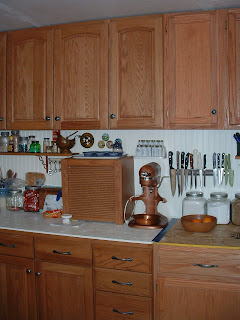
The long awaited kitchen update
We still need to do 2nd coats and sealing on many of the cabinets, but they will all match soon. So this entire kitchen is 90% new. Counter tops to replace the plywood are next. We still also need to install the decorative ceiling, flooring and new windows, but feel so good to be at this point. The plywood floor is actually growing on me. At least we were able to bring it all to code also as long as it was all torn out, we really didn’t have any choice.
The great TUB debate comes to an end!
For many months now we have been having a debate in our house about the CLAW FOOT TUB.
It started as this funky enclosure when we bought the house. I was sure that when I tore away the moldy enclosure that I’d find a tub on cinder blocks, but I found this great claw foot tub that just happened to be this ugly puke green color. We painted it a bronze color and and made all the plans to install the conversion shower kit, but in the end it looks like the claw foot tub will become the newest flower planter after all.
If we install a conventional tub and shower with a sliding door we’ll have 14 inches left over to build a built in towel shelf storage and we won’t have to worry about shower liners that may or may not fit the extra large tub (it’s over 6 feet long), and leaks from upstairs to down which has happened many times from our understanding and we’ll have a few extra square feet to the usable floor space. We’d been waiting to finish this bathroom until the plumbing was done which is what we’re doing now.
We found that parts of the main floor now need replaced. There had never been a proper connector on the toilet connection, just a wax ring between the toilet and the floor around this. We were going to do the floors later, but because of this new glitch along with all the sub floor that had to be cut and repaired when they did the plumbing we just decided that doing the floor now before putting in the new fixtures was the smartest thing to do.
We found this great sale at Menards (like a home depot) on an “exotic oiled teakwood plank” (which just means that the color is oiled teak and the exotic plank means it’s all one board) laminated floor made by Laura Ashley. Yeah, I know a designer floor! BUT, it has SOOOOOOOOOO many positives: It was MADE IN THE USA, it was on sale for the right price (less than the stuff made in china), the underlayment layer is already attached to the back of each plank (which means one less thing to buy or mess with, it was made in the USA, oh and did I mention it was on sale for the right price?
What a relief Kitchen Update
These all have just the first coat of stain, but oh what a relief.
I’ve been remiss in keeping the updates done on the house. For those of you just tuning in, we were FORCED into this remodel when the previous owner did not include a horrendous case of mold on their disclosure form. It’s taken us 16 months to tear out and put back most of the downstairs bathroom, kitchen, upstairs bathroom and part of our bedroom. We have finally put back the insulation, walls and almost all the cabinets (yep, it was in the cabinets too) in the kitchen. We were able to get the majority of the cabinets from a cabinet guy going out of business and are able to do the remaining one with over the counter cabinets from home depot. The ones from home depot have to be stained, stained again and then sealed, but are great especially compared to the price of ‘designer’ cabinets.
SPRAY PAINT is like DUCT TAPE and is my new best friend
So, I’m getting inventive. I found this old berry basket in the trash they left behind. It was stained and horribly dirty, but I vacuumed all the cobwebs out, washed and let it dry for a good long while and then grabbed my spray paint can of silver hammered paint. After that coat dried I did a quick once over with bronze hammer paint. Now I know spray paint is not environmentally friendly, but I figure the small amount of paint I used is so much better than throwing something old into the trash. I have also salvaged all the old registers from the house that were rusting and peeling and with some elbow grease and copper colored Rustoleum hammer paint now have restored new ‘old’ well made heat registers.
I even used it on the claw foot tub. It was painted a sick seafoam green and peeling. So I scraped the peeling paint and grabbed the Rustoleum bronze hammer paint and voila! It looks really beautiful. I can’t wait until the rest of the bathroom is done. Updates to come!
Winter Snow time
I posted the Fall color pictures, so I thought I’d post Winter too and then Spring and Summer to depict an entire year here in the North Woods.


