For the life of me I cannot remember where I adapted this recipe from, but it is a serious home run! It’s actually more sugar than I can tolerate and hubby said it was good, but felt we could go without the fudge layer completely and that it would still be great. I had also added a thin layer of blackberry jam that I will omit next time.
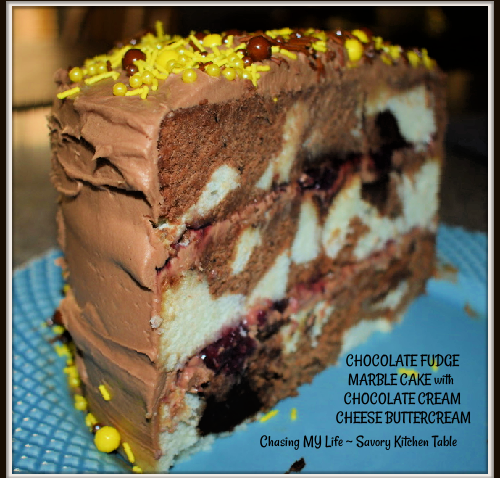
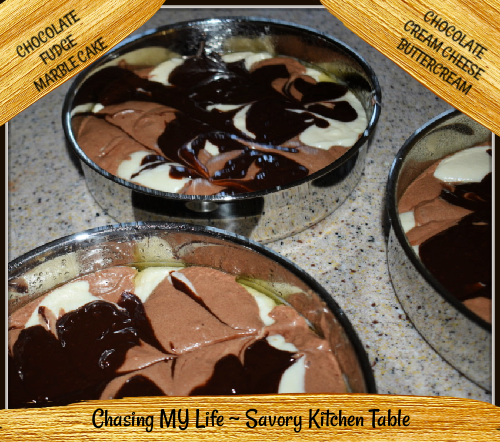
CHOCOLATE FUDGE MARBLE CAKE ~ THE PERFECT CELEBRATION CAKE
This recipe uses 1 batter 2 ways (vanilla and chocolate) swirled with a fudge ripple to create a simply delicious layer cake topped with a fudgy buttercream frosting. This was a scratch recipe that I’ve adapted to use weights trying for a more exact baking science.
VANILLA CAKE BATTER
3 cups all-purpose flour or 390 grams by weight
3 cups granulated sugar or 600 grams by weight
2 1/2 teaspoons baking powder or 10 grams by weight
1 teaspoon salt or 5 grams by weight
1 cup butter or 225 grams by weight unsalted butter, at room temperature
2 teaspoons or 10 grams by weight PURE vanilla extract
1 cup egg whites or 245 grams by weight – about 6 LARGE egg whites
1 1/2 cups buttermilk or 360 grams by weight, at room temperature
1/8 cup vegetable oil or 30 grams by weight
- Mix together all dry ingredients (flour, baking powder, sugar, and salt) in a stand mixer with a paddle until fully combined.
- Mix chunks of room-temperature butter slowly into the dry mix, on a low speed. Continue to mix until no large chunks of butter remain, and the mixture becomes crumbly.
- Pour in egg whites, and mix on low until just incorporated.
- Mix in the buttermilk in two installments, on a low speed.
- Add in vanilla and oil, and mix at a low speed until fully incorporated.
- Scrape down the sides of the bowl with a spatula, then beat on medium speed for about 30 seconds.
- Pour half of the batter (950 GRAMS) into a separate bowl and set aside.
CHOCOLATE CAKE BATTER
1/3 cup or 35 grams by weight unsweetened baking cocoa powder
1/4 cup or 50 grams by weight granulated sugar
1/2 teaspoon or 2 grams by weight baking powder
1/4 teaspoon or 1 gram by weight salt
1/4 cup egg whites or 60 grams by weight (about 2 egg whites)
1/4 cup or 45 grams by weight buttermilk
- Whisk together the cocoa powder, sugar, 1/4 salt, and baking powder into the remaining batter.
- Add the egg whites and buttermilk, mixing on a low speed until smooth.
CHOCOLATE FUDGE SWIRL
1 cup or 150 grams by weight MINI semi-sweet chocolate chips
1/4 cup or 55 grams by weight unsalted butter, at room temperature
1/4 cup or 60 grams by weight heavy cream, room temperature
- Combine the chocolate chips, butter, and heavy cream into a heatproof bowl.
- Heat in microwave for two 30-second intervals, stirring in between.
- Allow the mixture to cool 1 minute, then stir until smooth and set aside to cool.
CAKE PREPARATION
- Preheat oven to 350°.
- Line three 9 inch round cake pans with parchment paper AND grease with non-stick baking spray.
- Alternate spoonfuls of vanilla cake batter with the chocolate cake batter into the prepared cake pans, filling them roughly one inch high with batter.
- Randomly add small dollops about one inch in diameter of fudge swirl on top of the vanilla and chocolate cake batter.
- Drag an offset spatula or butter knife through the batter in horizontal and vertical lines to create a marbled pattern.
- Bake for 33-35 minutes until tester comes out clean.
- Allow to cool for 10 minutes, then run an offset spatula around perimeter of the pan to separate the cake from the pan.
- Level the cakes with a serrated knife as necessary once they’re fully cooled.
FUDGE BUTTERCREAM FROSTING – if simply icing without fancy decoration halve this recipe.
1 1/2 cups unsalted butter or 325 grams by weight (3 sticks) unsalted butter at room temperature
5 1/2 cups or 685 grams powdered sugar
1/2 teaspoon or 3 grams by weight salt
1/4 cup or 30 grams by weight heavy cream
1 tablespoon or 15 grams by weight PURE vanilla extract
1/2 cup or 40 grams by weight unsweetened baking cocoa
1/2 cup or 90 grams by weight semi-sweet or dark chocolate chips
- Beat the butter on a medium speed for 30 seconds with a paddle attachment, until smooth.
- Mix in the vanilla extract and salt on a low speed.
- Gradually add powdered sugar, 1 cup at a time. Alternate with cream.
- Mix on low for a couple minutes until the ingredients are fully incorporated, and the desired consistency is reached.
- If the frosting is too thick, add in more cream 1 tablespoon at a time or if frosting is too thin, add in more powdered sugar 1/4 cup at a time.
- Mix in baking cocoa powder and the melted chocolate chips.
- Place half of the buttercream into a separate bowl.
CAKE ASSEMBLY
- Stack the cake layers on a grease proof cake round or large serving plate.
- Spread a thin dab of buttercream on the center of the board, to help your cake layer stay in place.
- Next, center the first cake layer the cake board.
- Spread an even layer of buttercream onto the cake layer with an offset spatula.
- Repeat with remaining cake layers.
- Place the top cake layer upside down.
- Cover the cake in a thin layer of frosting, and smooth using a bench scraper.
- Chill the cake in the freezer for about 5 minutes, until the frosting is firm to the touch.
- At this point you can get creative with your decorating or add a final layer of buttercream smoothing as you go.
NOTES
- You can make the parts in advance and freeze them to make the process A LOT less tedious.
- Make your frosting ahead of time too and store in an airtight container in the refrigerator. Be sure to stir it well to smooth the consistency.
- You can add a marmalade or berry layer on top of each buttercream layer for a bit of an added oomph!
- A frosted cake can last in the fridge for up to a week, or in the freezer for up to a month. The buttercream locks in all the moisture, keeping the cake fresh and delicious! If you cut into the cake and have any leftovers, you can use remaining frosting to cover the cut section to keep it moist and store in the fridge for up to a week.
ALTERNATE CHOCOLATE CREAM CHEESE BUTTERCREAM
8 ounces cream cheese – 1 brick, 226 grams by weight, softened to room temperature
1/2 cup unsalted butter – 1 stick, 113 grams by weight, softened to room temperature
4 cups powdered sugar – 455 grams by weight, sifted
3 tablespoons QUALITY cocoa powder
1/2 teaspoon salt
3 teaspoons PURE vanilla extract
- Beat the cream cheese, butter until fluffy.
- Add vanilla and blend until creamy.
- Add powdered sugar, cocoa, and salt on low until combined.
- Beat on high 3-4 minutes until smooth, light, and creamy.
- Decorate as desired.