Be sure to join us for Happy Homemaker Monday and link up
with our host, Sandra at Diary of a Stay at Home Mom

Can you believe we are half way through November already? And that Thanksgiving is only 10 days away? Have you bought your turkey yet? On that same line of thinking we’re only 40 days from Christmas. This year sure seems to be FLYING by!


Yesterday was gorgeous and today we’re back to 100% chance of rain. The pond that was near barren just 6 weeks ago has been refilled. There was also a rock slide last Friday from all of last week’s rain that blocked the highway a few miles from our house. I believe that is supposed to reopen later today, but now they’re sating Tuesday. They originally estimate 5-600 cubic yards of debris to remove so they could repair the road. Last I heard it was now over 7,000 cubic yards so it is taking more time.
PICTURE OF SLIDE ON THIS LINK
The rest of this week is supposed to be much cooler and quite wet which is fine by me since I’ll be home and inside working.

I’d like to say last week’s appointment with the chronic care manger went well, but it didn’t even happen… I got to the receptionist to check in and was told the chronic care manager is no longer with the practice and they’ll get back to me when they get a new one. They didn’t even call to tell me the appointment had been canceled! I cannot tell you how infuriated I am with this particular medical practice.
They did get me in with the nurse practitioner o Friday and she ordered my monitor and set into works the specialty referrals I need to go back to the endocrinologist and dermatologist.
I also have a last appointment with my primary care doctor that I love and is the one leaving. I’m hoping to find out what practice she’s going to and see about transferring even though it means it’s 65 miles away. Sometimes small town living is bad… when it comes to not enough decent medical.
So once again I’m having hot water and peach yogurt while waiting for new referrals and monitors to be ordered. The delicate balance between reactive hypoglycemia and dumping syndrome is like walking a tightrope as you move through your day – EVERY day 24/7 and it is absolutely exhausting!

|
THIS WEEK’S TO DO LIST, PROJECTS & APPOINTMENTS
|
- LAUNDRY & CLEANING I’m half way through deep cleaning the ledges and everything on them in the living room cathedral ceiling area. Whose bright idea was it to do those stupid decorative ledges? Probably some man that didn’t have to think about cleaning them! I’ll spend the week finishing the baseboards and cleaning door jambs and windows so I’ll be ready for the carpet cleaners next Monday.
- GROCERIES & ERRANDS Hubby has a blood donation later today and I’ll drop him off and pick up the few groceries I need for the week. I have a blood draw on Friday, but no other errands as of now.
- PAPERWORK & PHONE CALLS Most things are on hold this week as I do the physical labor to get ready for next week. I’ll concentrate more on this category next week.
- RECIPE RESEARCH & MENU PLANNING Everything is planned through November and I’m working on some new recipes for December and a cookie exchange I’ll be participating in.
|

|
WHAT’S ON THE DVR/TV
|
- We’re “ALMOST” caught up on everything that was on the DVR during our trip and have been trying to watch all the new episodes as appropriate.
|

I’ve been reading some seasonal recipe magazines and tagging the recipes I’d like to make this winter. I also started a new series called Five Island Cove by Jessie Newton, but haven’t really gotten far enough into it to say whether I like it or not. Book number one is ‘The Lighthouse’.
I’ve also been reading up on the power of comfort food. I found a few Scandinavian recipes I plan to make over the winter. They say these recipes will brighten dark days 😀 Recipes like, Apple and Cinnamon Cake, Norwegian Cream Buns, Auntie Inga’s ‘Kladdaka’ aka sticky chocolate cake and Kanelbullar aka real cinnamon buns.

I’d really like to know the history, (no pun intended) of this billboard off the highway near where we live.


with the links to last week’s posted recipes, featured party links for the week and upcoming recipes to be posted soon.
|
|
MONDAY
|
TUESDAY
|
WEDNESDAY
|
THURSDAY
|
FRIDAY
|
SATURDAY
|
SUNDAY
|
|
DINNER
|
PAN SEARED CHICKEN with MASHED POTATOES & BUTTERMILK POBLANO GRAVY
|
LOADED HASH BROWN POTATO SOUP
|
ONE POT CHEESEBURGER PASTA
|
COMPANY CHICKEN & BROCCOLI SUN DRIED TOMATO RISOTTO
|
GRILLED PIMIENTO CHEESE SANDWICHES and BOOZY CREAM OF TOMATO SOUP
|
HONEY ORANGE PORK CHOPS and RICE PILAF
|
CAST IRON MEATLOAF and BAKED POTATOES
|
|
DESSERT
|
|
APPLE PEAR CAKE
|
|
|
|
|
|
We updated the Thanksgiving menu a bit – just decided there was too much food on it so we simplified to our favorite recipes. 😀


- GRAN’S APPLE CAKE aka HARVEST CAKE

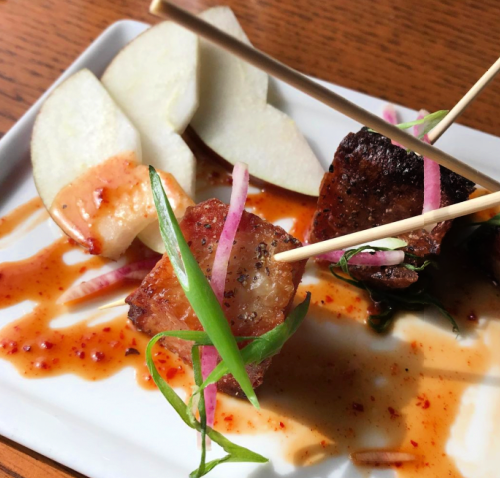
- PORK BELLY & CARAMELIZED PEARS