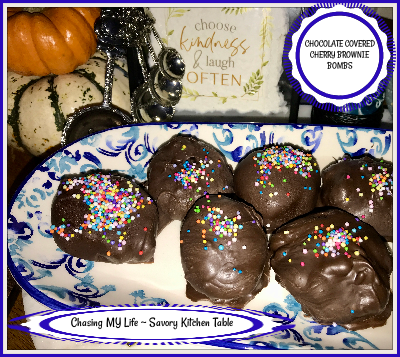
LIMONCELLO CAKE

LIMONCELLO CAKE adapted from MOM ON TIMEOUT

This is a SUPER MOIST cake full of lemony flavor that is PERFECT for everything from a breakfast treat, afternoon snack or an elegant dessert!

1 ¾ cups all-purpose flour
2 teaspoons baking powder
½ teaspoon salt
½ cup avocado oil
1 cup granulated sugar
3 tablespoons homemade limoncello or lemon vodka
1 cup FULL fat sour cream at room temperature
2 LARGE eggs at room temperature
1 tablespoon lemon zest
1 teaspoon lemon extract
½ teaspoon vanilla extract
2-3 drops yellow food coloring

  • Preheat the oven to 350°F.
  • Spray a 9×5 loaf pan or decorative rounds with non-stick cooking spray and line with parchment paper. Set aside.
  • In a large bowl, whisk together the all purpose flour, baking powder and salt.
  • In a medium bowl, whisk together oil, granulated sugar, sour cream, limoncello, lemon zest, eggs, lemon extract, vanilla extract and food coloring, whisking together just until combined. Be careful not to over mix.

  • Transfer the batter to the prepared pan and smooth top.

  • Bake for 45 to 55 minutes or until a toothpick inserted into the center of the cake comes out with moist crumbs. If using decorative rounds you’ll need to adjust your baking time accordingly.
  • Let the cake rest in the pan for 10 minutes before carefully removing and transferring to a cooling rack. Allow the cake to cool completely before adding the glaze.

LIMONCELLO GLAZE
1 cup powdered sugar sifted
2 to 3 tablespoons limoncello

  • Whisk the powdered sugar and limoncello together until no lumps remain. If it’s too thin add additional powdered sugar a tablespoon at a time until you reach your desired consistency. If it is too thick add a bit more Limoncello, a teaspoon at a time.)

  • Drizzle glaze over the top of the cooled cake. Let the glaze set up before slicing and serving.


HOMEMADE LIMONCELLO
10 LEMONS, washed
1 770 ML bottle of VODKA (brand of your choice)
3 cups water
2 cups sugar

  • Using a vegetable peeler, remove the peels from the lemons in long strips. Reserve the lemons for another use. If any of the peels still have pith on them use a sharp knife to remove and discard the pith.
  • Place peels in a 2 quart pitcher or bowl.
  • Pour the vodka over the peels and cover with saran.
  • Steep the peels for 4 days at room temperature undisturbed.
  • Add the water and sugar to a large saucepan over medium heat, whisking 5 minutes until sugar is completely dissolved.
  • Cool completely.
  • Pour the syrup over the vodka mixture.
  • Recover and let stand overnight at room temperature.
  • Strain the mixture through a mesh strainer, discarding the peels.
  • Transfer the Limoncello to your bottle.
  • Seal and refrigerate until cold.
  • Keep refrigerated up to a month.

GRASSHOPPER CHEESECAKE SQUARES

I’ve made Creme de Menthe Brownies for years, but when I found this recipe over at The Kitchen is My Playground I instantly fell in love.

The classic combination of a Grasshopper cocktail (creme de cacao and creme de menthe with cream) turned into a beautifully layered cheesecake treat is so very delicious! and a nice change from the deeper, darker and heavier brownie version.

GRASSHOPPER CHEESECAKE SQUARES Yield: 9 squares
1 1/2 cups (30-40 cookies) chocolate wafer cookie crumbs (gingersnaps are also quite good)
1/4 cup butter, melted
24 ounces cream cheese, at room temperature
1 1/4 cup granulated sugar
3 LARGE eggs, at room temperature
4 tablespoons white creme de cacao
1/4 cup + 2 tablespoons green creme de menthe
2 drops green food coloring (optional)
2 ounces semi-sweet baking chocolate squares, chopped

  • Preheat oven to 350°.
  • Spray a 9×9 baking dish with non-stick cooking spray.
  • Combine chocolate cookie crumbs and melted butter, mixing well.
  • Press cookie crumb mixture into the baking dish. Set aside.
  • Beat cream cheese for a minute at medium speed with an electric mixer until light and fluffy. Gradually add sugar, beating well.
  • Add eggs, one at a time, beating after each addition.
  • Stir in creme de cacoa.
  • Scoop out 2 and a 1/2 cups of the cheesecake batter and pour it over the cookie crumb crust, spreading evenly with a spatula.
  • Stir creme de menthe into remaining cheesecake batter.
  • Using a spoon or small measuring cup to work with small amounts of batter at a time, GENTLY pour the green cheesecake batter on top of the white cheesecake batter in the baking dish. You don’t want to disturb the layers too much.
  • Bake 45 – 55 minutes.
  • Cool to room temperature and then chill over night.
  • Cut cheesecake into small bars. cutting the bars prior to putting on the chocolate drizzle helps keep the drizzle intact and pretty.
  • Microwave chocolate squares in 20 second intervals until melted, stirring after each interval.
  • Add melted chocolate to a ziplock bag and seal.
  • Snip a very tiny hole in one corner of the bag and drizzle the chocolate over the bars. 
  • Store covered in the refrigerator. 

PINEAPPLE PEACH BREAD PUDDING

PINEAPPLE PEACH BREAD PUDDING is a summer dessert that’s bursting with pineapple and peach flavor, but can be easily converted to just about any flavor you want for any time of the year! Small wild blueberries are a winter favorite. 

😀 You can serve it with or without caramel sauce and ice cream 😀

8 cups bread, cubed
3 LARGE eggs
3 tablespoons melted butter
1 cup pineapple yogurt
1 cup WHOLE milk
2 cups Sugar
1 SMALL can pineapple, WELL drained

1 1/2 cups FRESH peaches, peeled, pitted and diced *(see note)
½ cups chopped pecans
1 teaspoon QUALITY cinnamon

  • Preheat oven to 350°.
  • Spray a 9×13 baking dish with cooking spray.
  • In a large bowl beat 3 eggs, add melted butter, yogurt and milk. Add 2 cups sugar slowly, stirring until it is dissolved. Add peaches and bread, mixing well.
  • Allow mixture to soak into bread 30 minutes.
  • In a small bowl, stir together 2 Tbsp sugar and 1 tsp cinnamon.
  • Pour the bread mixture into 9×13 baking dish, and sprinkle with cinnamon sugar mixture. Cover loosely with buttered foil and Bake for 20 minutes.
  • Remove the foil, sprinkle with the pecans and bake until the top is golden and the center is set, 20 to 25 minutes longer.

CARAMEL SAUCE
1 cup unsalted butter
1 cup heavy cream
1 cup brown sugar

  • In a heavy saucepan over medium-low heat, stir together the butter, heavy cream, and brown sugar, bring to a boil.
  • Reduce heat to low, simmer until the sauce thickens, for about 5 minutes.
  • Pour over individual bread pudding servings.
  • Top with vanilla ice cream.

NOTE: You can use canned peaches or even frozen peaches. If using canned peaches be sure to drain them EXTRA well. If I use these I start the draining the night before and just cover them in the fridge over night. If using frozen, thaw them overnight and the drain well.

CHOCOLATE CHOCOLATE CHIP CARAMEL PUDDING COOKIES

CHOCOLATE CARAMEL CHOCOLATE CHIP PUDDING COOKIES

Yields 2-3 dozen cookies – Do your own experimenting with pudding flavors and/or chip flavors!  Adapted from Life in the Loft House

1 cup salted butter softened
3/4 cup brown sugar
1/4 cup granulated white sugar
1 – 3.7 ounce box GODIVA instant caramel chocolate pudding mix
2 LARGE eggs
1 teaspoon PURE vanilla extract
2 ⅓ cups all purpose flour
1 teaspoon baking soda
1 – 11 ounce package QUALITY milk chocolate chips

  • Preheat oven to 375°.
  • Line baking sheets with parchment.
  • Sift together the flour and baking soda. Set aside.
  • In a large bowl, or stand-mixer, combine the butter, sugars, pudding mix, eggs and vanilla.
  • Beat on medium speed until creamy and combined.
  • Gradually add in the flour and baking soda to the mixture, beating on low speed until just combined.
  • Stir in the chocolate chips.
  • Drop batter by tablespoons on un-greased cookie sheets.
  • Bake for only 9 to 10 minutes. They may not seemed fully baked, BUT THEY ARE! DO NOT OVER BAKE!
  • Remove from oven and let cookies rest and cool on the cookie sheets. There is no need to transfer them to wire racks, but be sure to cool them completely before putting them in the cookie jar.
  • Enjoy these delicious devils by dunking them in milk! ♥

ORANGE RASPBERRY BUTTER CAKE

ORANGE RASPBERRY BUTTER CAKE Yield 2 9inch layers, 12-16 serving(s)
1 cup butter, softened
1 1/2 cups sugar
3 LARGE eggs
3 LARGE egg yolks
1 tablespoon PURE vanilla
3 1/4 cups cake flour
1 1/2 teaspoons baking powder
1/4 teaspoon salt
1 cup WHOLE milk
1/4 cup orange liqueur (raspberry liqueur or rum also work well)

  • Preheat oven to 350°.
  • Butter and flour two 9-inch round cake pans.
  • In mixer bowl, on medium-high speed, beat butter and sugar 4-5 minutes until fluffy.
  • Add eggs, then yolks, one a time, beating well after each, scraping sides of bowl occasionally.
  • Beat in vanilla.
  • In another bowl, sift together flour, baking powder and salt.
  • Mix in about a third of flour mixture into butter mixture.
  • Stir in half the milk and liqueur, just until blended.
  • Stir in another third of flour mixture,.
  • Add the remaining milk and liqueur and then the rest of the flour mixture.
  • Spread batter equally into the cake pans.
  • Bake 25-30 minutes until toothpick inserted in the center comes out clean.
  • Cool on racks in pans for 10 minutes, then invert cakes onto racks and remove pans.
  • Cool completely before frosting.

NOTE: This cake is good with or without frosting or glaze.

ZEBRA CAKE

While this recipe didn’t turn out exactly as planned, the flavor was amazing so we will be trying again for a better stripe and a better picture. 😀

ZEBRA CAKE

VANILLA LAYER
2 ¾ cups cake flour
2 cups granulated sugar
1 tablespoon baking powder
1 teaspoon salt
6 tablespoons unsalted butter softened to room temperature
⅔ cup avocado oil
¾ cup whole milk, room temperature
½ cup sour cream
1 tablespoon clear vanilla extract
6 LARGE or EXTRA LARGE egg whites, room temperature

  • In a stand mixer sift together flour, sugar, baking powder, and salt until thoroughly combined.
  • Turn your mixer to low speed and add butter, one tablespoon at a time, not adding the next tablespoon until the first is completely incorporated. When you’re finished, the mixture should resemble coarse sandy crumbs.
  • Add oil and stir until combined.
  • In a measuring cup, whisk together milk, sour cream, and vanilla extract and stir into batter until thoroughly incorporated.
  • In a separate clean, dry, chilled and grease-free bowl use clean beaters to beat egg whites to stiff peaks.
  • Use a spatula to gently fold egg whites into batter – DO NOT OVER MIX, but make sure there are no lumps of egg white remaining either.
  • Portion 3 cups of batter into a separate bowl. You’ll be left with 5 cups in the first bowl that will be used to make into the chocolate batter.

CHOCOLATE LAYER
scant ¼ cup dark cocoa powder
2 tablespoons boiling water
2 tablespoons sour cream
2 tablespoons granulated sugar

  • In a large measuring cup, stir together hot water and cocoa powder – it will be thick!
  • Add sour cream and sugar, whisking until well combined.
  • Stir into the smaller bowl of batter and use a spatula to carefully stir together until completely combined

BAKING ASSEMBLY

  • Preheat your oven to 350°.
  • Prepare two 8 inch round cake pans AT LEAST 2” deep by lining each of the bottoms with a round of parchment paper and generously spraying the sides with baking spray.
  • Dollop approximately ⅓ cup of white batter into the center of each of your prepared cake pans.
  • Using a clean scoop, scoop just shy of ⅓ cup of chocolate batter and drop that directly onto the center of the white batter.
  • Repeat, alternating batter flavors, until you have used all of the batter.
  • Take a reasonable amount of care so that your white batter doesn’t touch another ring of white batter nor does a ring of chocolate overlap with any of the other chocolate batter, this will keep your stripes looking like stripes and not like marbled swirls.
  • Carefully transfer pans to oven and bake for 35-40 minutes or until a toothpick inserted in the center comes out clean or with moist crumbs.
  • Allow to cool in pans for 15 minutes then run a knife around the edges of the cake to loosen from the sides (if needed) and carefully invert onto a cooling rack to cool completely.
  • If needed, carefully level the cakes with a sharp serrated knife once completely cooled.
  • Decorate.

NOTES:

  • THIRD STRIPE If you would like a 3rd color stripe make a half batch of the vanilla cake and add food coloring accordingly. You’ll also need to use 9 inch pans. If making it a red strip I use a half portion of my red velvet cake recipe.
  • CAKE FLOUR I recommend cake flour for two reasons with this cake: 1) it has a lighter texture and when you use all-purpose flour the cake ends up a bit heavier and tends to sink in on itself a little bit. 2) it produces a finer crumb, which makes the stripes even bolder and more defined.
  • VANILLA EXTRACT you may substitute regular vanilla extract, but clear extract helps to keep the cake batter pure white.
  • COCOA POWDER I use “special dark” cocoa powder because it makes the zebra stripes darker and closer to black, but you may substitute natural cocoa powder.

RED VELVET CAKE
2 1/2 cups all purpose flour
1 1/2 cups sugar
1 teaspoon baking soda
1 teaspoon fine sea salt
1 teaspoon QUALITY cocoa powder
1 1/2 cups avocado oil
1 cup buttermilk, room temperature
2 LARGE eggs, at room temperature
2 tablespoons QUALITY red food coloring
1 teaspoon white distilled vinegar
1 teaspoon PURE vanilla extract

  • Preheat the oven to 350°.
  • Lightly oil and flour three 9 by 1 1/2-inch round cake pans.
  • In a large bowl, sift together the flour, sugar, baking soda, salt, and cocoa powder.
  • In another large bowl, whisk together the oil, buttermilk, eggs, food coloring, vinegar, and vanilla.
  • Using a standing mixer, mix the dry ingredients into the wet ingredients until just combined and a smooth batter is formed.
  • Divide the cake batter evenly among the prepared cake pans.
  • Place the pans in the oven evenly spaced apart.
  • Bake, rotating the pans halfway through the cooking, until the cake pulls away from the side of the pans, and a toothpick inserted in the center of the cakes comes out clean, about 30 minutes.
  • Remove the cakes from the oven and run a knife around the edges to loosen them from the sides of the pans.
  • Invert the cakes onto a plate and then re-invert them onto a cooling rack, rounded-sides up. Let cool completely.

FINAL ASSEMBLY

  • Place 1st layer, rounded-side down, in the middle of a rotating cake stand.
  • Using a palette knife or offset spatula spread 1/4 to 1/2 inch layer of the frosting over the top of the cake.
  • Carefully set second layer on top, rounded-side down, and repeat.

SWISS MERINGUE BUTTERCREAM (not as sweet as an American buttercream)
Yield: 5 cups

Swiss Meringue Buttercream is not as sweet as American buttercream which makes it PURE perfection in my book because it’s the ideal balance of sweet AND creamy, without being as sugary as American buttercream, but still as thick and pipe-able.

6 LARGE FRESH egg whites (approximately 230g)
2 cups (400g) granulated sugar
1 and 1/2 cups (3 sticks; 350g) unsalted butter, cut into tablespoon sized pieces and softened but still cool *see note*
2 teaspoons PURE vanilla extract
1/8 teaspoon salt

  • Separate the eggs one at a time into a small bowl before placing them in a heat proof bowl.
  • Whisk sugar into the egg whites, then set the bowl over a saucepan filled with just two inches of simmering water over medium heat. Do not let the bottom of the egg whites bowl touch the water.
  • Whisk the egg whites and sugar together 4-5 minutes until sugar is COMPLETELY dissolved and the mixture has thinned out. (The mixture will be thick and tacky at first and then thin out and be frothy white on top.) To test that it’s ready, use your finger. Lightly and quickly dip your finger into the mixture (BE CAREFUL it will be very hot) and rub the mixture between your thumb and finger. You shouldn’t feel any sugar granules. OR use an instant read thermometer – the temperature should read 160°F (71°C).
  • Transfer mixture to the bowl of a stand mixer fitted with a whisk attachment while it’s still warm.
  • Beat on medium high speed 10-15 minutes until stiff glossy peaks form and the meringue is no longer warm to the touch. This will take a few minutes more on particularly humid days. MOISTURE IN THE MAKES A DIFFERENCE. If it’s still not reaching stiff peaks, stop the mixer, place the uncovered bowl in the refrigerator for 10 minutes, then return to the mixer and continue beating until stiff peaks form and the mixture has cooled to room temperature. You can put it in the refrigerator for a couple minutes if needed. If it’s too warm, the butter will melt instead of blend.
  • Switch to the paddle attachment.
  • On medium-high speed, add the butter 1 tablespoon at a time. Wait for the butter to fully mix in before adding the next tablespoon.
  • Add the vanilla, salt and flavor if using beating 30 seconds until completely incorporated. It should be thick, creamy and silky smooth.

NOTES

TROUBLESHOOTING TOO THICK  If the meringue has separated, curdled, or is too thick at any point after you mix in all of the butter, place the mixture in your heat-proof bowl back over a pot of 2 inches of simmering water – DO NOT STIR. Let the edges of the meringue warm up 1-2 minutes and become liquid while the center of the meringue is still be solid. Remove from heat and return to the mixer. Beat meringue on low speed for 30 seconds, then switch to medium-high speed and beat until smooth, about 2 minutes.

TROUBLESHOOTING TOO THIN If the meringue becomes too thin after you add the butter, place the entire bowl in the refrigerator for no more than 20 minutes at a time (any longer will make the butter solid) to cool down. Return it to the mixer and beat on medium-high speed until thickened.  If it’s still soupy, place back in the refrigerator again before re-whipping again.

EGG WHITES For best success use FRESH eggs. FUN FACT – eggs separate much easier when they’re cold. Be sure and separate the egg whites one at a time into a small bowl and then place the egg white into a large heat-proof mixing bowl, double boiler or the metal mixing bowl from your stand mixer before separating the next. This way, if a yolk breaks in one of them, you don’t waste the whole batch.

BUTTER This buttercream will become liquid-y (too thin) if the butter is too warm. Make sure you’re using butter that is slightly cooler than proper room temperature butter. Remove butter from the refrigerator and set it out for just 30-40 minutes before you need to add it to the meringue.

FLAVORS adding flavors can be tricky. Substituting extracts for the vanilla is one of the most fool proof ways.  Or even a teaspoon of espresso powder or frozen fruit powder. Taste, then add a touch more if desired. For potent extracts, like peppermint or almond use just 1/2 teaspoon. For chocolate, beat 8 ounces of PURE (like Baker’s OR Ghiradelli) melted and slightly cooled chocolate of choice into the buttercream at the same time you add the vanilla and salt.

COLORS If you are coloring use gel food coloring so it does not add any liquid.

HALVING OR DOUBLING If you halve the recipe the time to reach stiff peaks and cook time will be less. I DO NOT recommend doubling this recipe. If you need a double recipe make it in separate batches so you don’t overcrowd the bowls.

OR

CREAM CHEESE FROSTING
16 ounces cream cheese, softened
1/2 cup butter, softened
juice of 1 LARGE lemon
2 teaspoons PURE vanilla extract
3-4 cups powdered sugar

  • In a medium bowl beat cream cheese and butter until smooth.
  • Add lemon juice and vanilla. Beat until blended.
  • Add powdered sugar gradually until well blended and smooth and you reach desired consistency.
  • Ice first layer and then add 2nd cake top and ice again including sides of cake.
  • Refrigerate 1 hour to set icing before serving.

CHOCOLATE CHIP COOKIES

These cookies are meant to be dense because they are served warm with ice cream or drizzled caramel. For best results do NOT just eat them directly from the jar. If you want to just eat the cookie only, for the best flavor and texture heat it in the microwave for 15 seconds first 😀

CHOCOLATE CHIP COOKIES ala MOLLY YEH

Level: Easy Total: 45 min Active: 25 min Yield: 12 servings

4 cups all-purpose flour
2 teaspoons kosher salt 
1 1/2 teaspoons baking powder 
1 cup unsalted butter, at room temperature 
2 cups light brown sugar 
2 LARGE eggs, at room temperature 
2 teaspoons PURE vanilla extract 
2 cups semisweet chocolate chips 
1 cup milk chocolate chips 
Flaky salt, for sprinkling 

  • Place an oven rack in the middle position.
  • Preheat the oven to 350°.
  • Line two rimmed baking sheets with parchment paper an set aside.
  • In a medium bowl, sift together the flour, salt and baking powder until combined. Set aside.
  • In the bowl of a stand mixer fitted with the paddle attachment, cream together the butter and brown sugar until JUST combined, scraping down the bottom and sides as needed.
  • Add the eggs and vanilla extract and beat to incorporate.
  • Add the flour mixture and mix slowly until JUST BARELY combined.
  • Mix in the chocolate chips.
  • Scoop out a slightly-heaping, 1/2-cup scoop of dough and place on a prepared baking sheet.
  • Lightly press the dough to flatten into the shape of a hockey puck. Repeat with the remaining dough, placing 6 cookies on each baking sheet and making sure to evenly space apart.
  • Sprinkle the tops with flaky salt.
    Bake the cookies until golden brown around the edges and lightly browned on top, 15 to 20 minutes.

NOTES:

  • The additional flour in this recipe makes for a more substantial cookie that stays firm. The recipe I’ve been using for decades uses 3 1/2 cups flour and only 1 teaspoon of salt.
  • Molly’s recipe called for semi-sweet and dark chocolate chips. The flavor of chips is up to you and your flavor palette. I used semi-sweet mini chips and milk chocolate.
  • After placing on baking sheet they can be frozen for use at a later date. If baking from frozen start checking the cookies for doneness at the 20 minute mark.


APPLE PIE STREUSEL MUFFINS

APPLE PIE STREUSEL MUFFINS adapted from OMG CHOCOLATE DESERTS I made this batch using a Texas size muffin pan, but find they are better as regular size because they are so rich and filling.

CINNAMON STREUSEL TOPPING
1 cup all-purpose flour
¼ cup granulated sugar
¼ cup light brown sugar
6 tablespoons unsalted butter, melted and cooled slightly
1 teaspoon QUALITY cinnamon

  • In a small bowl, whisk together flour, sugar, brown sugar and cinnamon, add melted butter and stir with a fork until crumbly and set in the fridge until ready to use.

MUFFINS
2 cup all purpose flour
3 teaspoons baking powder
½ teaspoon salt
¼ teaspoon ground nutmeg
1 1/2 teaspoons QUALITY ground cinnamon
2 LARGE eggs
1 cup granulated sugar
1 cup vanilla Greek yogurt
1/2 cup vegetable oil
1 teaspoon PURE vanilla extract
1 ½ cups COMSTOCK apple pie filling, chopped small

  • Preheat the oven to 400°.
  • Line standard muffin pan with paper liners and set aside.
  • Prepare streusel topping and set aside.
  • In a large bowl stir together flour, baking powder, salt, cinnamon and nutmeg, then set aside.
  • In a medium bowl, whisk together eggs and granulated sugar until combined.
  • Whisk in yogurt, oil, and vanilla extract – mixture should be a pale yellow.
  • Fold wet ingredients into dry ingredients and mix everything together by hand. The batter will be quite thick.
  • Spoon batter into prepared muffin tins, filling less than two thirds.
  • Tap the pan onto working surface to remove air bubbles.
  • Add a heaping tablespoon of chopped apple pie filling on top of batter and gently press the apples into the batter.
  • Reduce the heat to 375° and place pan in center of shelf.
  • Bake about 19-22 minutes or until the toothpick inserted in the center comes out clean.
  • Cool for 5 minutes in the pan then remove muffins and cool on a wire rack.

Honestly these are great without the glaze, but they are phenomenal with the glaze.

GLAZE
1 cup powdered sugar
1–2 Tablespoons milk

  • Stir together powdered sugar and milk. If it’s too thin add more powdered sugar, if it’s too thick add more milk.
  • Drizzle glaze over cooled muffins.

NO KNEAD BREAD

This is a SUPER easy to use with other meats and/or make sweet instead of savory. Thanks Molly! 😀

NO KNEAD BREAD

Level: Easy Active: 30 min Yield: 6 servings
Total: 16 hr 50 min (includes overnight rising and cooling time)

3 cups (400 grams) bread flour, plus more for dusting
2 teaspoons kosher salt 
1/2 teaspoon instant yeast 
1 1/3 cups (320 grams) water 
8 ounces Genoa salami, diced into 1/4-inch pieces 
1/4 cup finely chopped fresh chives 
Butter, for serving, if desired 

  • In a large bowl, whisk together the flour, salt and yeast.
  • Add the water and stir with a stiff silicone spatula until combined and there are no longer bits of flour, 20 to 30 seconds. (It will be very sticky.)
  • Cover with saran and let sit on the counter at room temperature overnight, 12 to 18 hours.


  • Remove saran. It will have a funky, fermented aroma and bubbles.
  • Sprinkle one-third of the salami and chives over the top.
  • Using a rubber spatula, fold the outside of the dough over the salami to cover.
  • Repeat this process two more times until all of the salami and chives are folded in.


  • Lay a piece of parchment paper on the counter and sprinkle with an even layer of 1/4 cup flour to cover the surface.
  • Scrape the dough onto the floured parchment and use heavily-floured hands to shape it into a roundish blob.
  • Press in any exposed salami bits and pinch the dough to seal.
  • Sprinkle the top with another layer of flour and cover with a piece of saran.
  • Let sit until the dough has risen by half, 1 1/2 to 2 hours.


  • Place an oven rack in the lower third of the oven and preheat to 450°.
  • Place a 3-4 quart lidded Dutch oven on the rack and allow to heat while the oven reaches the desired temperature.


  • When the dough has proofed, carefully remove the Dutch oven from the oven and remove the lid.
  • Remove the saran from the bread and using the corners of the parchment lower the bread dough into the Dutch oven parchment and all.
  • Cover the Dutch oven and bake for 30 minutes.
  • Remove the lid, then bake until the top is golden brown and crusty, another 10 to 20 minutes.
  • Let it cool on a rack for about an hour, then slice and serve with butter if desired.

GERMAN APPLE PANCAKES

GERMAN APPLE PANCAKES Yield: serves 6

adapted from Ruth Reichl’s recipe

Dousing these apple pancakes in rum and setting them on fire IS optional, but it is not recommended to do so. This dramatic step only enhances the flavor of the caramelized apples so fragrant with cinnamon and nutmeg that you can taste the boozy rolled pancakes before you ever even cut into them.

2 Granny Smith or Honey Crisp apples, peeled, cored, and THINLY sliced
2 tablespoons FRESH lemon juice, plus more for drizzling – 1 LARGE lemon
4 tablespoons unsalted butter, divided
¼ cup PACKED light brown sugar
3/4 teaspoon QUALITY ground cinnamon
LARGE Pinch of FRESH grated nutmeg
3 LARGE eggs
¾ cup all-purpose flour
2 tablespoons sugar

1 tablespoon sanding sugar, plus more for sprinkling
Pinch of kosher salt
1 cup WHOLE milk
¼ cup dark rum or cognac (optional)

  • In a medium bowl, add the apples and 2 tablespoons of lemon juice, tossing to coat.
  • In a medium skillet over medium-high heat, melt 2 tablespoons butter.
  • When the foam begins to subside, stir in the brown sugar, cinnamon, and nutmeg.
  • Add the apples and cook until darkly caramelized and fragrant, 11–12 minutes.
  • Remove from the heat and set aside.
  • In a large bowl, beat the eggs, then whisk in the flour, granulated sugar, and salt until smooth.
  • Add the milk and continue whisking until a thin, smooth batter forms.
  • In a nonstick 8-inch skillet over medium heat, melt 1 teaspoon butter.
  • When the foam begins to subside, pour in ⅓ cup batter, tilting the skillet to coat the entire surface with batter and form a thin pancake. Cook until just set, about 2 minutes.
  • Evenly distribute one-third of the apples over the pancake, then pour another ⅓ cup batter on top, tilting the skillet to coat the surface and the apples with batter.
  • Cook until the edges of the fresh batter have begun to set, 1–2 minutes, then use two wide, offset spatulas to flip the pancake. Continue cooking until the bottom is evenly golden brown, 1–2 minutes more, then turn out onto a large plate.
  • Sprinkle generously with granulated sugar, then roll the pancake up like a jelly roll.
  • Sprinkle with more granulated sugar, and if desired, drizzle with a few drops of lemon juice.
  • Repeat with the remaining batter and apples to make a total of 3 rolled pancakes.
  • In the skillet used to cook the apples, add the rum and remaining 1 tablespoon butter; warm over medium heat.
  • Add the pancakes, spoon the rum mixture over the top, and remove from the heat.
  • Working quickly and carefully, use a gas lighter or a long match to set the pancakes on fire.
  • Shake the skillet gently until the flame goes out, then transfer the pancakes to a large plate.
  • Serve warm.

The Revival of the INCREDIBLE MYSTERY FUDGE

Last weekend my friend who is the local Eagle’s Auxiliary president held her last fundraising function for the year. We did a Paint-N-Sip event at the post. We had a great turn out and in the end made a hefty sum to add to the scholarship fund. We did raffle tickets for some incredible baskets, served a small lunch, sipped mimosas and had a great time. It wasn’t my pick for a painting, but it was for a good cause 😀

One of the things we did to raise money was hold a guessing raffle. I made a BIG batch of my incredible mystery fudge. This recipe originated 15 years ago or so when I was approached by Country Bob’s All Purpose Sauce to promote their cookbook and sauce. I can’t find the sauce anywhere around here, but it tastes suspiciously like A1 sauce so that makes a great substitute. No one was able to guess the mystery ingredients, but we had some wild guesses – everything from mayonnaise to pop rocks 😀

INCREDIBLE MYSTERY FUDGE
12 ounces Velveeta cheese, cut into cubes
2 sticks butter
6 ounces unsweetened chocolate
2 tablespoons Country Bob’s All Purpose Sauce or A1 sauce
2 pounds powdered sugar
1 teaspoon PURE vanilla extract
3/4 cups heath bar bits (optional)
3/4 cups chopped pecans (optional)

  • In a microwave safe bowl combine the Velveeta, butter, Country Bob’s All Purpose Sauce and chocolate.
  • Microwave on high 2-4 minutes, stirring every minute until mixture is smooth and well blended.
  • Pour the powdered sugar into a large mixing bowl.
  • Gradually add the chocolate mixture while beating with an electric mixture until well blended.
  • Beat in the vanilla.
  • Stir in the nuts, heath bar bits or your desired combination totaling 1 1/2 cups.
  • Pour into a greased 9×13 pan.
  • Cover and chill until firm.
  • Store in the refrigerator.

DOUBLE CHOCOLATE CHEWY BROWNIES

These are made from one of the gift jars I made for Christmas presents. They are a simple and perfectly delicious treat for any day 😀

DOUBLE CHOCOLATE CHEWY BROWNIES
Prep Time 5 mins Cook Time 22 mins Total Time 27 mins

1 cup granulated sugar
⅓ cup unsweetened cocoa powder, sifted
½ cup all-purpose flour
¼ teaspoon sea salt
¼ teaspoon baking powder
1/3 cup mini semi sweet chocolate chips

Sift together all dry ingredients.
Place into a jar or airtight container.
Add chips to top and seal tightly.

On a tag add the following:

ADDITIONAL INGREDIENTS:
½ cup butter, melted, then cooled
2 LARGE eggs, room temperature
1 teaspoon PURE vanilla

  • Preheat oven to 350°.
  • Spray an 8×8 square baking dish.
  • Melt butter and set aside to cool slightly.
  • In a medium bowl, whisk together the eggs and vanilla.
  • Mixing with a wooden spoon gently add the dry ingredients, stirring just until combined.
  • Add melted butter into mixture mixing just until incorporated.
  • Spread batter in a prepared pan and bake for 20-25 minutes based on your consistency desire.
  • Cool completely before cutting.