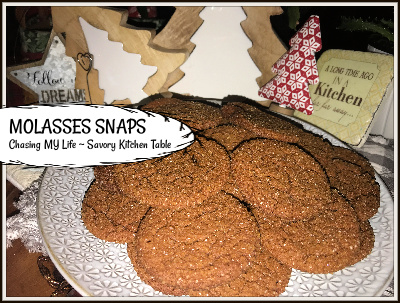
STRAWBERRY PINEAPPLE BANANA BREAD 


STRAWBERRY PINEAPPLE BANANA BREAD
1 cup packed brown sugar
1 cup butter, DIVIDED
2 JUMBO eggs
1 tablespoon QUALITY cinnamon
1/4 cup coconut flavored rum
1/2 cup golden raisins
8 ounces crushed pineapple, drained WELL
1 cup rustic chopped strawberries
2 LARGE, RIPE bananas

1/2 cup crushed walnuts (optional)

1/4 cup sugar

2 1/4 cups AP flour
1 1/2 teaspoons baking powder

1/2 teaspoon baking soda

  • Place the raisins in a small bowl and cover with rum. Set aside to soak for 10 minutes and then drain WELL.
  • Combine 1 stick of the butter, brown sugar and bananas in a sauce pan cooking until smooth and sugar is dissolved.
  • Fold in strawberries, pineapple, nuts and raisins.
  • Stir until well coated & set aside to cool.
  • Cream softened butter, sugar and eggs until fluffy.
  • Sift together flour, baking powder, baking soda and cinnamon.
  • Add this to the creamed mixture gradually until well blended.
  • Add cooled banana mixture.
  • Pour into greased and floured pan(s)*
  • Bake at 350° for 45+ minutes.

*NOTE:* This recipe will make 2 large loaves or 1-2 snack cakes or 18 muffins…

FROSTING (optional)use this if you want to turn it into a snack cake.
8 ounces cream cheese, softened
1/4 cup butter, softened
Juice of 1 SMALL lemon
1 teaspoons PURE vanilla extract
1 1/2 cups powdered sugar

  • In a medium bowl beat cream cheese and butter until smooth.
  • Add lemon juice and vanilla. Beat until blended.
  • Add powdered sugar gradually until well blended and smooth.
  • Frost snack cake.
  • Refrigerate 1 hour to set icing before serving.

RASPBERRY RICOTTA ALMOND CAKE

I took a Ricotta cheese making class several months ago at a local winery, Joseph Jane. It was a wonderful night that culminated in this cake after a tasty lasagna meal. I also discovered my new favorite wine, Pink Panik.

RASPBERRY RICOTTA ALMOND CAKE
1 1/2 cups AP flour
1 cup sugar
2 teaspoons baking powder
1/2 teaspoon sea salt
3 LARGE eggs
16 ounce container of FULL fat ricotta cheese
1 teaspoon PURE vanilla extract
1 stick butter, melted and cooled
1 1/2 cups raspberries, plus a few for garnish
1/4 cup sliced almonds

  • Preheat oven to 350°.
  • Line a 9 inch spring form pan with parchment paper and spray with non-stick cooking spray.
  • Sift together the flour, sugar, baking powder and salt in a large mixing bowl.
  • Whisk together the eggs, ricotta cheese and vanilla until smooth.
  • Stir egg mixture into the dry mixture.
  • Fold in cooled melted butter until smooth.
  • GENTLY fold in raspberries.
  • Pour batter into prepared pan.
  • Scatter the almonds and remaining berries over the top of the batter.
  • Bake 50 minutes or until golden brown and center is cooked through.
  • Let cool 20 minutes BEFORE unmolding.

Honestly making your own ricotta is easy, but ALSO time consuming and in my opinion not really worth the trouble when there are so many less expensive options. That said, if you really want to give it a try, here’s the recipe. The original recipe came from Career Girl Meets.

You will need some cheesecloth and a candy thermometer for special equipment.

1 gallon WHOLE milk
1 quart buttermilk
1 cup heavy whipping cream
1 teaspoon salt

  • In a LARGE pot stir together the above ingredients.
  • Clip a candy thermometer to the pot. This is a crucial step as you are looking for an exact 195°.
  • Cook over low to medium heat and stir liquid occasionally. You will begin to see the milk separate and the curd form.
  • When the temperature reaches 195°, REMOVE the pot from the heat and let it sit for 35 minutes. DO NOT STIR DURING THIS TIME.
  • Line a colander with three layers of damp cheesecloth.
  • Place colander over a large bowl. This bowl will catch the excess whey as it drains.
  • Pour the cooled curds into the colander.
  • Use a spatula and GENTLY stir the ricotta to drain the whey from the cheese.
  • Wrap the cheese in the cheesecloth and GENTLY squeeze to allow the excess whey to drain.
  • Place the cheese in the refrigerator for several hours.
  • After several hours, unwrap the cheese and discard the cheesecloth.
  • Keep refrigerated.

RECIPE REVIEW
TASTE: Just sweet enough, but not overly sweet.
TEXTURE: Tender crust with a pop of berry here and there and crunchy almonds.
EASE: Easy to hard – depending on whether you make your own ricotta cheese.
APPEARANCE: Appetizing and visually appealing.
PROS: Great meal for company.
CONS: None that I found!
WOULD I MAKE THIS AGAIN? DEFINITELY Yes. BUT, I would use store bought ricotta for the ease.

CHOCOLATE CHIP BANANA BREAD PUDDING with MAPLE SAUCE

CHOCOLATE CHIP BANANA BREAD PUDDING with MAPLE SAUCE yields 2 pans

PUDDING
12 cups combination of torn croissant pieces and sourdough pieces
6 cups half and half
12 LARGE eggs
2 cups VERY ripe mashed bananas (about 6 LARGE)
2 cups sugar
2 tablespoons PURE vanilla
1 tablespoon QUALITY cinnamon
2 cups mini chocolate chips

  • Preheat oven to 350°.
  • Spray 9×13 pans with non-stick cooking spray.
  • Toss bread and croissant pieces with the chocolate chips.
  • Mash bananas.
  • Whisk together the eggs, half and half, sugar, vanilla and cinnamon.
  • Fold in bananas.
  • Arrange bread and croissant mixture loosely in the pans.
  • Pour banana egg mixture evenly over bread pieces.
  • Gently press the the bread into the custard mixture so bread absorbs the custard.

TOPPING
1 1/2 cups toasted chopped walnuts
1 1/2 cups PACKED brown sugar
1/2 cup melted butter

  • In a small bowl combine brown sugar and chopped walnuts.
  • Drizzle butter into brown sugar nut mixture, stirring to mix well.
  • Sprinkle the nut mixture evenly over the bread pieces.
  • Bake 40-45 minutes until golden and cooked through and set well.

SAUCE
1/2 cup maple syrup
1/2 cup PACKED brown sugar

  • In a sauce pan whisk together the maple syrup and brown sugar 5-7 minutes until the sugar is dissolved and mixture ALMOST boils.
  • Remove from heat and serve over warm banana bread.

NOTES:

  • Mash bananas, but leave them a bit chunky.
  • A powdered sugar sprinkle makes a good alternative to the maple sauce if serving for a potluck or buffet.
  • Adding rum soaked raisins gives it a real kick too!

SHORT CUT APPLE PIE CUPCAKES

SHORT CUT APPLE PIE CUPCAKES

yields 24 cupcakes PREP 15 minutes COOK 15 minutes TOTAL 30 minutes

A fun and easy apple pie cupcake recipe made with a spicy cinnamon roll dough, spicy apples and a sweet crumble topping. Is there anything better than the sweet smell of an apple pie baking? I think not.

APPLE FILLING
6 tablespoons unsalted butter
6 large Granny Smith apples, peeled, cored and diced in to 1/4-inch cubes
6 tablespoons brown sugar
2 teaspoons QUALITY ground cinnamon (I use red ape)
3/4 teaspoon FRESH ground nutmeg
SCANT 1 teaspoon salt
Juice from LARGE lemon

  • Melt butter in a large skillet over medium-high heat.
  • Add the diced apples and cook 5 minutes or so, tossing occasionally, until they start to soften.
  • Stir in brown sugar, cinnamon, nutmeg and the salt.
  • Cook 5 more minutes, or until tender.
  • Stir in lemon juice.
  • Set aside.

CRUMBLE
6 tablespoons unsalted butter
3/4 cup WONDRA
3/4 cup dark brown sugar
1/4 teaspoon QUALITY cinnamon
1 teaspoon FRESH grated nutmeg

3/4 cup chopped walnuts

  • Add the flour, brown sugar, cinnamon, nutmeg and walnuts to a medium bowl.
  • Grate the butter with a cheese grater over the bowl.
  • With a pastry cutter work the butter in until crumbly.
  • Set aside.

CUPCAKES & ASSEMBLY
3 cans (8 count) refrigerated cinnamon roll dough (store bought or home made is up to you!)

  • Heat oven to 400°.
  • LIGHTLY spray muffin tins with cooking spray.
  • Separate cinnamon roll dough into 24 rolls.
  • Flatten each into 4-inch round then place into each muffin cup so it comes up the sides evenly.
  • Divide the cooled apple filling mixture evenly into muffin cups.
  • Top with the crumble topping.

  • Bake the cupcakes 15 minutes or until bubbly and tops are light brown.
  • Cool in the pan 5 minutes then transfer to a cooking rack.

TOPPING – your choice – store bought or home made is up to you!
Whipped cream
Ice cream
Caramel sauce drizzle

  • Serve the cupcakes with topping of choice.

COCONUT MACAROONS

Soft, chewy and yet crispy and golden. YUM!

COCONUT MACAROONS yields 2 dozen cookies

14 ounces sweetened Baker’s Angel Flake flaked coconut
¾ cup plus 2 tablespoons sweetened condensed milk
1 teaspoon PURE vanilla extract
2 LARGE eggs whites
¼ teaspoon salt
4 ounces QUALITY (GHIRADELLI) semi-sweet chocolate, chopped

  • Preheat the oven to 325°F.
  • Arrange oven racks near the center of the oven.
  • Line two baking sheets with parchment paper or silpats.
  • In a medium bowl, mix together the coconut, sweetened condensed milk and vanilla extract. Set aside.
  • Beat the egg whites and salt until stiff peaks form.
  • Use a large rubber spatula to fold the egg whites into the coconut mixture.
  • Using a mini ice cream scoop or gloved hands sprayed with non-stick cooking spray, form heaping tablespoons of the mixture into mounds on the prepared baking sheets, spacing about 1 inch apart.
  • Bake for 23 to 25 minutes, rotating the pans from top to bottom and front to back, until the tops and edges are ALL golden.
  • Let cool on the pans for a few minutes, then transfer to a wire rack to cool completely.
  • Melt the chocolate in a microwave-safe bowl at medium power, stopping and stirring at 30 second intervals, until just smooth and creamy or melt the chocolate in a double boiler over simmering water.)
  • Dip the bottoms of the macaroons in the chocolate, letting any excess drip back into the bowl, and return to the lined baking sheets. Place the macaroons in the refrigerator for about 10 minutes to allow the chocolate to set.

NOTES:

  • A drop or two of food coloring can make these festive for any special occasion – red for Valentine’s Day, green for St. Patrick’s Day, pink or blue for a baby shower, etc…
  • The cookies keep well in an airtight container at room temperature for about a week or they can be frozen for up to 3 months.
  • If freezing, DO NOT DIP in the chocolate until you thaw them out. Remove the cookies from the freezer and let them come to room temperature before dipping in chocolate or serving.

RUM RAISIN CARROT CAKE with CREAM CHEESE FROSTING

This has been a family favorite for many years and is the first dessert I taught my niece, Amber how to bake with so it has some seriously “sweet” memories 😀

RUM RAISIN CARROT CAKE with CREAM CHEESE FROSTING
CAKE
2 1/2 cups flour
2 teaspoons baking soda
1/4 teaspoon salt
1 tablespoon cinnamon
1 cup packed golden brown sugar
1 cup sugar
1 1/2 cup butter, softened
3 JUMBO eggs
2 teaspoons PURE vanilla extract
1/4 cup golden rum** SEE NOTE
3 cups grated carrots
8 ounce can crushed pineapple, drained well
1 cup golden raisins
1/2 cup chopped walnuts

  • Pour rum over raisins and set aside for at least an hour.
  • Preheat oven to 350°.
  • Grease and flour 2-9 inch cake pans or line cupcake tins.
  • In a large bowl sift together the flour, baking soda, salt, cinnamon and sugars.
  • In another bowl cream together the butter, brown sugar, vanilla and 1 egg.
  • Add additional eggs and beat until well creamed.
  • Add dry ingredients gradually until well blended.
  • Add carrots, pineapple and walnuts until well blended.
  • Drain raisins and fold in last.
  • Pour batter into prepared pans.
  • Bake 1 hour or until toothpick comes out clean.
  • Cool 10 minutes.
  • Invert cakes onto rack and cool completely.

**NOTES:

  • As an option you could soak the raisins in orange juice instead of the rum and then substitute 1 teaspoon maple flavoring for the rum.
  • This recipe also makes scrumptious cupcakes.

FROSTING
16 ounces cream cheese, softened
1/2 cup butter, softened
Juice of 1 LARGE lemon
2 teaspoons PURE vanilla extract
3 cups powdered sugar

  • In a medium bowl beat cream cheese and butter until smooth.
  • Add lemon juice and vanilla, beating.
  • Add powdered sugar gradually until well blended and smooth.
  • Ice first layer and then add 2nd cake top and ice again including sides of cake.
  • Refrigerate 1 hour to set icing before serving.

Save Room for dessert new badgeOriginally posted 7-26-2010 for OURkRazZykitchen a food blog a friend and I hosted 😀
Update posted 7-26-2022

NO CHURN VANILLA ICE CREAM ala A KID from KID’S BAKING CHAMPIONSHIP or NO CHURN COOKIES & CREAM ICE CREAM

July 17th was National Ice Cream Day. So I made ice cream of course 😀

Hot where you are? What better way to beat the heat than to make some homemade ice cream? The best part about this recipe is that it’s a completely no churn, soft serve recipe.  It’s so good!! It disappears pretty quickly, so why not make a double batch. It is also great to change up in flavor by using flavored Oreos, freeze dried fruit flavors or a FRESH berries coulee! This one is plain with a hint of color and chocolate sauce.

NO CHURN ICE CREAM ALA Duff Goldman serves 6

One 14-ounce can sweetened condensed milk
1 teaspoon pure vanilla extract **See NOTES
Pinch kosher salt
2 cups heavy cream
Your favorite toppings, such as sprinkles, caramel syrup, etc. for serving

  • In a large bowl, whisk together the sweetened condensed milk, vanilla and salt.
    In a stand mixer fitted with a whisk attachment, whip the heavy cream to stiff peaks, about 3 minutes.
  • Gently mix a scoop of the whipped cream into the condensed milk mixture. Fold in the rest of the whipped cream very gently. Be careful not to overmix and deflate the mixture.
  • Transfer to a freezer container or a loaf pan, smooth the top, then press a piece of wax paper against the surface. This will prevent ice crystals from forming.
  • Freeze until the ice cream is frozen and scoopable, 6 hours to overnight.
  • Scoop the ice cream into bowls and serve with your favorite toppings or with a pie or cobbler. Enjoy!

NOTE: A great alternative is using 1/2 vanilla extract and 1/2 mint. And if you are using mint, why not add some mini chocolate chips too?

OR

NO CHURN COOKIE & CREAM ICE CREAM serves 6

2 cups heavy whipping cream
1 can sweetened condensed milk
1 tablespoon PURE vanilla extract
HALF of a 3 ounce package of vanilla pudding mix (or your flavor of choice)
1/2 normal package of Oreos, crushed (flavor of choice)

  • In a bowl, whip the heavy whipping cream and whip until stiff peaks begin to form.
  • In a separate bowl, pour in 1 can sweetened condensed milk.
  • Add the vanilla and the vanilla pudding.  Mix well.
  • Add in half of the crushed Oreo cookies and mix.  
  • Pour this mix into the whipped cream, and fold it in gently.
  • In a metal loaf pan, pour about half of the mixture.
  • Add a layer of crushed Oreos, and then top with the remaining ice cream mixture.
  • Sprinkle the top with the remaining crushed Oreos.
  • Cover with press and seal or plastic wrap and freeze for 24 hours.

NOTE: Make this any flavor you want by using flavored oreos.

BLUEBERRY SOUR CREAM BREAD & MUFFINS

Whether you are starting your morning or having a midnight snack these super moist muffins with a blueberry burst in every bite topped with a buttery, sweet, crunchy crumble are a hit. PLUS these are super easy and come together in just minutes! They’ll keep several days IF THEY LAST THAT LONG!

BLUEBERRY SOUR CREAM BREAD & MUFFINS

MUFFINS
2 LARGE eggs
3/4 cup sugar
1 cup sour cream
1/2 cup avocado oil
1 1/4 teaspoon PURE vanilla
2 1/4 cup all purpose flour
1 1/2 teaspoons baking powder
1/2 teaspoon baking soda
1/2 teaspoon salt
2 cups FRESH small WILD blueberries** see notes

  • Preheat the oven 400°.
  • Line 12 muffin cups with muffin papers or spray with cooking spray.
  • In a medium mixing bowl, whisk together the eggs and sugar until fluffy.
  • Add the sour cream, oil, and vanilla and whisk to combine.
  • In a larger mixing bowl, stir together the flour, baking powder, baking soda, and salt.
  • Add the wet ingredients and stir JUST until combined. DO NOT OVERWORK THE BATTER! Overworked batter will not rise very well and will be tough.
  • Gently fold in the blueberries.
  • Fill the muffin cups with about 1/4 cup of batter or 3/4 full.

STREUSEL
1/4 cup salted butter
1/4 cup dark brown sugar
1/2 cup all purpose flour
1/2 teaspoon QUALITY cinnamon (I use Red Ape)
1/4 teaspoon salt

  • Using a cheese grater grate the butter into the flour, brown sugar, salt, and cinnamon.
  • Using a pastry cutter work the butter into the flour mixtures until the mixture resembles course crumbs.
  • Place 1-2 tablespoons on the top of the muffin batter in each muffin cup.
  • Bake for 18-22 minutes until a toothpick inserted in the center comes out clean.

NOTES: FROZEN blueberries can be substituted and they do not need to be defrosted first. Defrosted will also work, but the juices will turn your muffins a little purple. Still tasty, just purple.

WINE MARINATED FROZEN GRAPES

This recipe is an INCREDIBLY light, healthy and easy way to make the perfect tasty treat. It is the PERFECT garnish for any charcuterie board or wine spread.

WINE MARINATED FROZEN GRAPES

3 cups PLUMP green grapes removed from their stems (see notes)
1 – 2 cups QUALITY white wine (see notes)
3 tablespoons white granulated sugar

  • Place grapes in a bowl and cover with wine.
  • Allow to marinate refrigerated for 12+ hours, though I personally recommend 24-48 hours. The longer they sit, the tastier they are.
  • Drain grapes, toss in sugar and freeze AT LEAST 2 hours.

NOTES:

  • This recipe easily converts to red grapes also though you may want to use a red wine of choice.
  • They make the perfect “ice cubes” to keep your wine chilled on a hot summer day if you skip the sugar part. 😀

CHERRY CRUMBLE BARS

CHERRY CRUMBLE BARS

BARS
1 1/2 cups butter, softened
3 cup granulated sugar
1 1/2 teaspoon salt
5 LARGE eggs
1 1/2 teaspoon PURE vanilla extract
1 1/2 teaspoon PURE almond extract
5 1/2 cups all-purpose flour
1 1/2 teaspoon baking powder
2 cans (21 ounce) COMSTOCK cherry pie filling (see notes)
1/2 cup brown sugar
1 cup honey nut granola, crushed

  • Preheat oven to 350°.
  • Line a large (12×17) jelly roll pan with aluminum foil. Spray with nonstick spray. Set aside.
  • Cream together butter and sugar, about 1-2 minutes.
  • Add salt, eggs, and vanilla and almond flavorings and continue stirring until fully incorporated.
  • Add flour and baking powder and mix until just combined. Reserve 1 3/4 cup of dough.
  • Spread and gently press half the dough into the prepared baking pan.
  • Top with cherry pie filling.
  • To the remaining 1 3/4 cups batter add in the brown sugar and granola pieces.
  • Drop remaining batter in small pieces over the cherry filling.

  • Place pan in the oven and bake for 50-60 minutes or until golden brown.Turn pan halfway.
  • Remove from the oven and place pan on a wire rack to cool completely.
  • Cool completely before glazing.

GLAZE
1 cup powdered sugar
3 tablespoons milk

  • 

Whisk together confectioners’ sugar and milk until smooth and drizzle over the bars.
  • Cut into squares and serve.

NOTES:

  • This recipe works well with apple, lemon and peach also as well as the apple/cherry or apple/blackberry combinations.
  • This can be made in 2 9×13 pans to stretch farther. When I do that I use a 3rd can of pie filling.

BUTTERMILK FUDGE BROWNIE CAKES

BUTTERMILK FUDGE BROWNIE CAKES
2 cups flour
2 cups sugar
1 teaspoon baking soda
1/4 teaspoon salt
1 cup water
1 cup butter, cut into pieces
1/2 cup unsweetened cocoa powder
2 eggs
1/2 cup buttermilk

1 1/2 teaspoons PURE vanilla extract

  • Preheat oven to 350°.
  • Grease 13×9 inch baking pan.
  • In a large bowl sift together the flour, sugar, baking soda and salt.
  • In a 2 quart saucepan combine water, butter and cocoa powder bring it JUST to a boil, stirring constantly. Remove from heat.
  • Add cocoa mixture to flour mixture, beating on medium until thoroughly combined.
  • Add eggs, buttermilk and vanilla, beating 1 minute more. Your batter will be thin and that’s okay.
  • Pour into prepared pan.
  • Bake 25-35 minutes until toothpick comes out clean.
  • Pour warm frosting over brownies, spreading evenly.
  • Cool at least one hour before cutting into bars.

CHOCOLATE BUTTERMILK FROSTING
1/4 cup butter
3 tablespoons unsweetened cocoa powder
3 tablespoons buttermilk
2 1/4 cups powdered sugar
1/2 teaspoon PURE vanilla extract
1/4 cup chopped roasted walnuts or pecans, optional

  • Combine the ingredients in a medium saucepan.
  • Bring JUST to boiling.
  • Remove from heat.
  • Add powdered sugar and vanilla, beating until smooth.
  • Topped with roasted nut of choice if desired.

JELLY DONUTS

JELLY DONUTS slightly adapted from Home Remedies

2 3/4 cups flour – 350g flour
5.07 ounces – 15 cl lukewarm milk
2 LARGE eggs
1 packet dehydrated baker’s yeast
1/3 cup – (25 grams sugar) + a little to decorate
Pinch of salt
grated lemon zest
1 3/4 tablespoons (25 grams) softened butter
frying oil
powdered sugar

lemon curd *or your favorite flavor
sour cherry jam *or your favorite flavor

  • In the bowl of a mini food processor with a dough hook (or in a LARGE bowl if doing it by hand), sift together the flour, yeast, sugar, salt and grated lemon zest.
  • Add the lukewarm milk and knead just to combine.
  • Add the whole beaten eggs and mix again to obtain a homogeneous paste.
  • Add the butter cut into pieces and knead for at least 5 minutes until the dough is very elastic.
  • Cover dough with clean tea towel & let rise in a warm place about at least 2 hours. (SEE NOTE)


  • Flatten dough by hand & knead for another minute to remove bubbles.
  • Roll out the pastry on a lightly floured work surface to 1/4 inch – 5mm thickness.
  • Cut out circles with a 2 inch (5 cm) cookie cutter diameter and place them on a floured board, cover with the tea towel and leave to rise for another 45 minutes. (SEE NOTE)


  • Heat the oil in a fryer and when it is very hot try it with a single donut first, it should not color too quickly and will be completely cooked in 2-3 minutes. They should be blonde. When you have found the right temperature you can dip several donuts at the same time.
  • Immediately dredge them in powdered sugar.
    Let them cool down on a paper towel.
    Fill them with jam using a pastry bag.
    Enjoy!

NOTE: I recently found a WONDERFUL trick for rising dough in the winter. Use a heating pad on LOW under your bowl or tray and everything will rise PERFECTLY!!